
ARTICLE AD
Administer flows
100 XP
6 minutesWelcome to the Admin center! The Admin center is the central location where tenant admins and environment admins manage an organization's data policies and environments. Any changes that you make in the Admin center are immediately available to users in the organization.
In this module, you'll learn how to:
Import and export flows.Share flows.Monitor flows.Open the Admin center
There are two ways to open the Admin center.
Option 1: Power Automate settings
Go to Power Automate, and sign in by using your organizational account.
Select the Settings button (the gear symbol), and then select Admin Center on the menu.
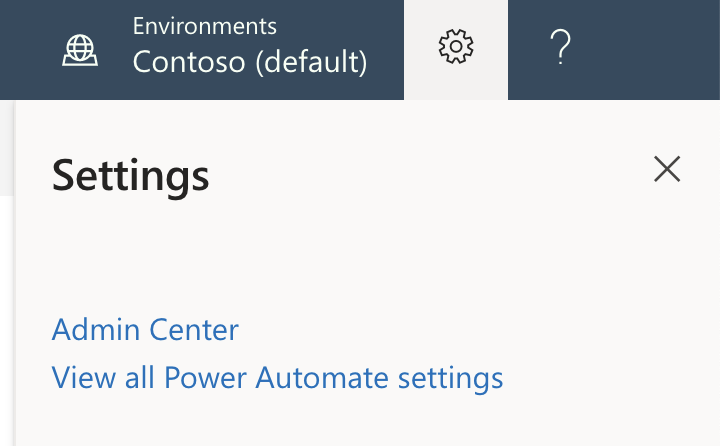
The Admin center is opened.
Option 2: Open the admin center directly
Go directly to the Admin center, and sign in by using your work account.Environments
An environment is a space where you can store, manage, and share your organization's business data, apps, and flows. It also serves as a container to separate apps that might have different roles, security requirements, or target audiences.
The way that you use environments depends on your organization and the apps that you're trying to build. Here are some examples:
You can create separate environments to group the test and production versions of your apps.You can create separate environments that correspond to specific teams or departments in your company. Each environment holds the relevant data and apps for each team/department.You can create separate environments for different global branches of your company.You can build all your apps in a single environment.Data policies
When you use Power Automate, the data is automatically protected with whatever security roles your organization already has in place. It isn't possible to use Power Automate to get access to information that the user doesn't already have access to in the organization. Some organizations may want to add an additional, optional layer of security that can proactively block flows that violate certain policies.
Export and import flows
100 XP
8 minutesPower Automate allows you to export and then import a flow so that others can use it.
Export a flow
Go to Power Automate, and sign in by using your organizational account.
In the left pane, select Cloud flows.
For the flow that you want to export, select the More commands button (the three vertical dots), select Export, and then select Package (.zip).
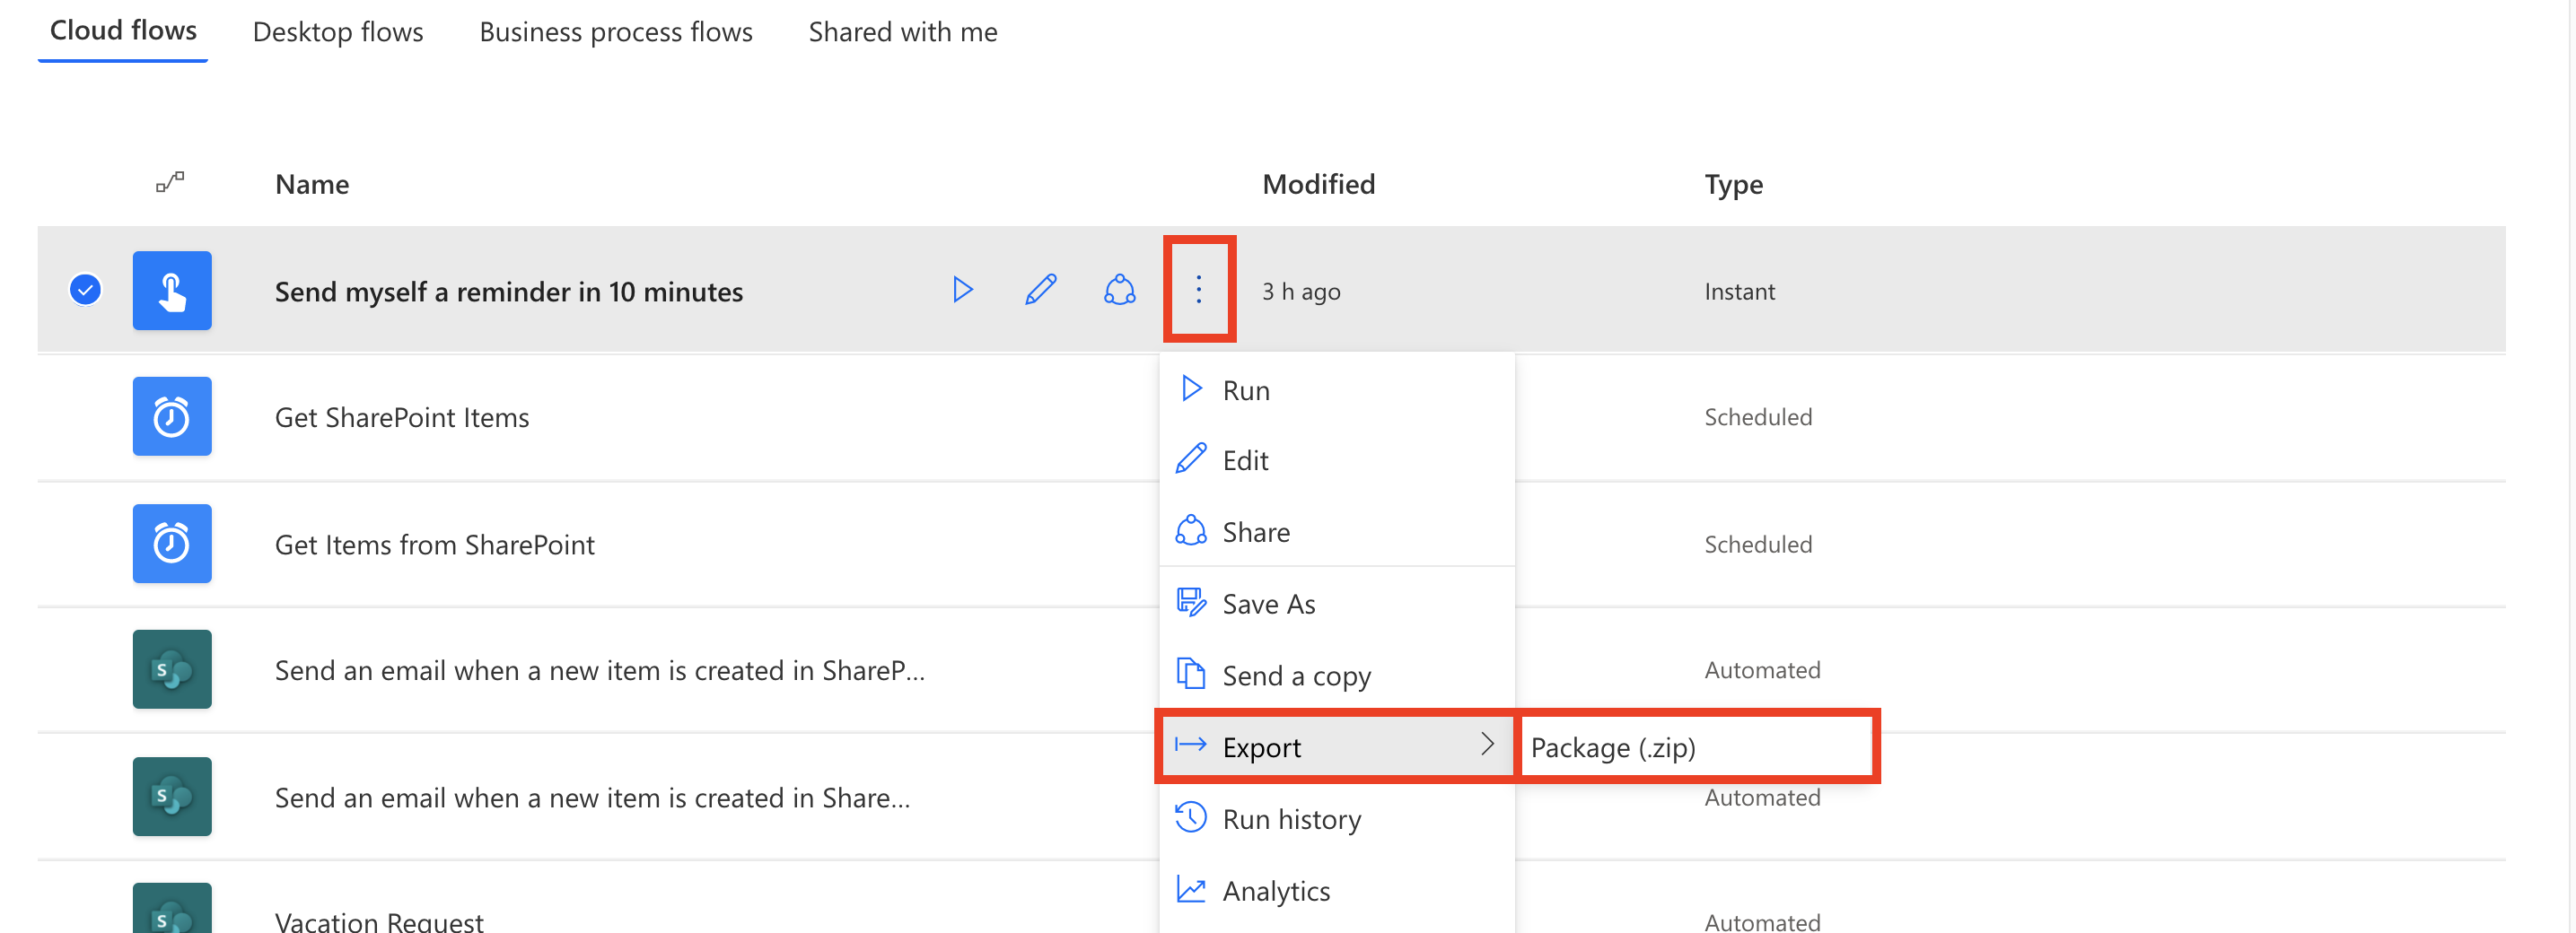
Fill in the package details:
Name: Enter a name for the flow.Environment: Enter the environment for the flow.Description: Enter a description of the flow.Review Package Content: Select export options, and add comments to provide instruction or add version notes.Select Export to export the zip file. You can then select the folder to in which to download.
When you export a flow, the dependent resources for your flow are also exported into the package.
Import a flow
After a flow has been exported, anyone that you send the zip file to can import it.
Go to Power Automate, and sign in by using your organizational account.
In the left pane, select My flows.
Select Import.
On the Import package page, select Upload, and then, in the dialog box, select the zip file that you exported.
Back on the Import package page, select Import.
In the flow settings, you can select whether to create a new flow or update an existing one with the flow definition from the package.You must also select the connections that are required to set up the flow as part of the import process.The Import button should become available after you've configured all the required settings.After the flow is imported, you will have a link to open it and see the flow in My Flows, under the Cloud flows heading.
Learn how to distribute button flows
100 XP
14 minutesIn the Power Automate mobile app, you can share button flows with other users or groups in your organization. The users or groups with whom you share a button can then run it the same way they run their own buttons.
You can also share a link to buttons that another person shared with you.
You can stop sharing your buttons at any time.
The screenshots in this unit were taken on a Apple iOS device. If you're using an Android or Windows device, what you see might differ, but the functionality is the same.
Prerequisites
To share buttons, you need:
An account that has access to Power Automate.A flow to share.A mobile device that has the Power Automate mobile app for Android, Apple iOS, or Windows Phone.A person or group in your organization with whom to share your button.Share a button
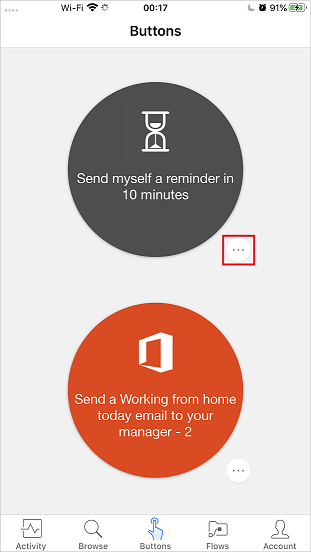
You share a button by using the Buttons tab of the Power Automate mobile app.
Start the Power Automate mobile app.
On the Buttons tab, select the three dots next to the button that you want to share.
On the pop up, select Invite others.
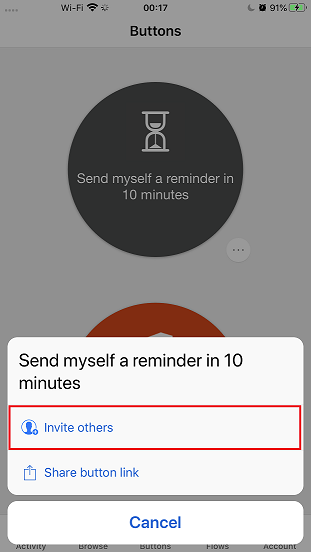
On the following page you can manage users with whom you have already shared the flow. For this exercise, select Invite others again to continue with sharing.
Search for and select the person or group that you want to share the button with.
Select Send.
On the page that states that the button sharing action was successful, select Done.
Require users to use their own connections
When you share a button with other people, you can either let them use all the connections that the button uses or require that they use their own connections. Follow these steps to require the people with whom you share your button to use their own connections.
Note
If you let other people use your connections, they can't access the credentials in your connection. They also can't reuse those connections in any other flow.
On the page that appears immediately after you share a button, select Manage connections.
Select Edit for the connection that you want to manage.
Select Provided by user or your email address to specify whose connections must be used in the shared button.
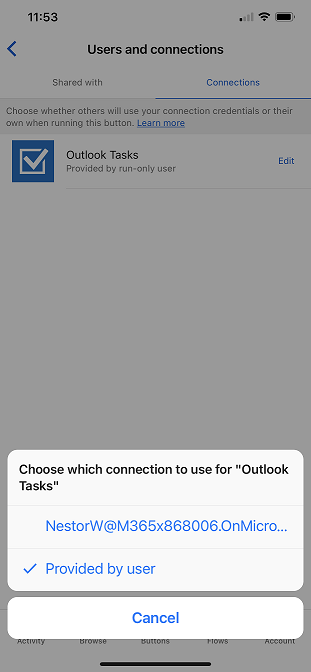
You can view or change your selection at any time.
On the Flows tab, select the flow that you shared.On the Users and connections page, on the Connections tab, select Edit for the button that you want to manage.Stop sharing a button
You can stop sharing a button by following these steps.
On the Buttons tab, select the three dots next to the button that you want to stop sharing.
On the pop up, select Invite others.
On the following page you can manage users with whom you have already shared the flow. On this page, select the user which you wish to remove.
On the user's page, select Remove user.
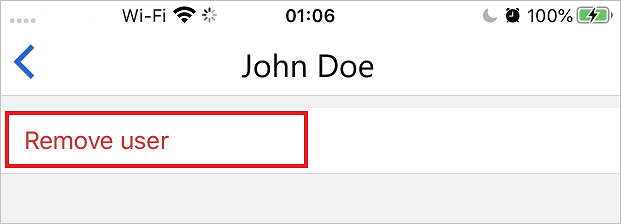
Wait for the removal action to be finished. The list on the Button users page is refreshed, and the user or group that you removed is no longer listed.
Monitor the run history
You can view the whole run history, even for runs started by a person that a button is shared with.
Start the Power Automate mobile app.Select the Activity tab to view the run history.Use shared buttons
Before you can run a button that someone has shared with you, you must add it to your Buttons tab from the Add buttons page.
On the Buttons tab, select Get more (or the New buttons are available banner if it appears).
Select the button to use.
The button is immediately added to the Buttons tab. You can then run the button from the Buttons tab, just like any other button that's listed there.
Re-share a button
You can share a link to a button that has been shared with you.
On the Buttons tab, select the three dots next to the button that you want to share.
Select Share button link.
Select the app that you want to use to share the button.
Follow the steps for sending a button to a person that you want to share it with.
Stop using a shared button
If you no longer want to use a button that was shared with you, you can remove it.
On the Buttons tab, select the three dots next to the button that you no longer want to use.
Select Remove.
Note
After you remove a shared button, you can add it back by selecting Get more on the Buttons tab.
Check your knowledge
200 XP
6 minutesKnowledge check: Administer flows
1.
After a flow has been exported, who can import the flow?
Only System Customizers
Only System Administrators
Only the user that exported the flow
Anyone that receives the zip file can import it
Anyone that receives the zip file can import the flow.
2.
Which of the following is a requirement to share button flows?
An account that has access to Power Automate.
A Power Automate account is a requirement to share button flows.
An account that is a System Customizer.
An account that is a System Administrator.
A SharePoint account and Power Automate sharing rights.
3.
What are some actions for which you can use the admin center?
Connect to Dynamics 365 and write flows
Share and create button flows
Manage Environments and Data policies
Correct! Environments are spaces where you can store, manage, and share your organization's data, apps, and flows. Data policies allow you to implement additional security measures.
Import and Export flows


 Bengali (Bangladesh) ·
  English (United States) ·