
ARTICLE AD
Introduction
100 XP
1 minuteNot only does the Power Platform serve the needs of small businesses and large enterprise level companies, but it can also improve productivity for individual users. In this module, we'll focus on the key features available in Power Automate that can make your life easier.
If you're a beginner with Power Automate, this module will expand your flow skills. If you already have some experience, this module will tie concepts together and help fill in the gaps.
Be more productive automatically, that's what Power Automate is all about.
So, let's get started!
Exercise - Build a flow that uses information like locations or date
100 XP
8 minutesYou can build button flows that use information like Global Positioning System (GPS) data, date information, or email. This information is available as trigger tokens. Trigger tokens are data points that are known and available to the device that a button flow is running on. These tokens change, based on factors like the current time or the current geographic location of the device.
For example, if you run a button flow on a phone, the phone probably knows the time at your current location, the date, and your current address. In other words, the time and date, and the address where the phone is located, are determined when the button flow runs. They're automatically available for use in any button flows that are run on the device.
You can use these trigger tokens to build useful flows that minimize repetitive tasks. Such tasks include providing your location to someone or tracking how much time you spent on a particular job or service call.
List of button trigger tokens
Here's the list of button trigger tokens that are available to you when you create button flows.
| City | The city where the device that's running the flow is located. |
| Country/Region | The country/region where the device that's running the flow is located. |
| Full address | The full address where the device that's running the flow is located. |
| Latitude | The latitude where the device that's running the flow is located. |
| Longitude | The longitude where the device that's running the flow is located. |
| PostalCode | The postal code where the device that's running the flow is located. |
| State | The state where the device that's running the flow is located. |
| Street | The street where the device that's running the flow is located. |
| Timestamp | The time in the area where the device that's running the flow is located. |
| Date | The date in the area where the device that's running the flow is located. |
| User name | The user name of the person who's signed in to the device that's running the flow. |
| User email | The email address of the person who's signed into the device that's running the flow. |
Create a button flow that uses trigger tokens
When you create a button, you can use trigger tokens to add rich functionality to it.
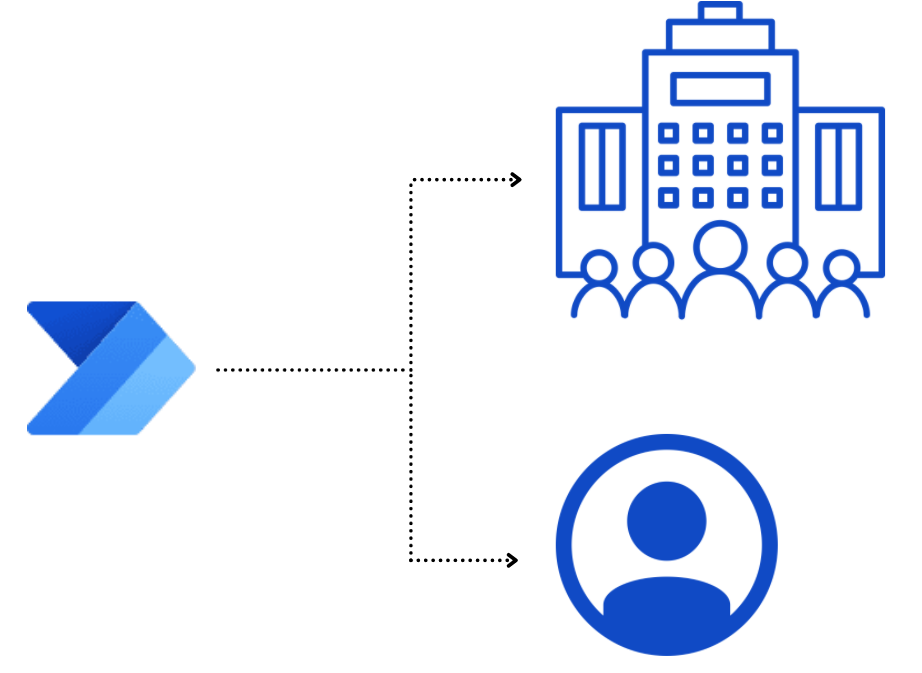
Let's create a button flow on a mobile device to let your colleagues know you're working from home today.
Although the procedures in this unit show screenshots from an Apple iOS device, the experience is similar on Android and Windows Phone devices.
Prerequisites
A work or school email address, or a Microsoft account that has access to Power Automate
The Power Automate mobile app for Android or iOS.
Create the button flow
Launch the Power Automate mobile app and sign in using your organizational account.
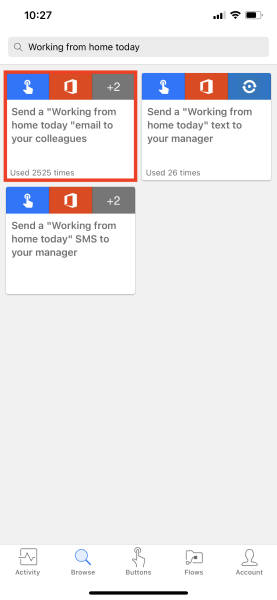
Select Browse.

Search for Working from home today and select the Send a "Working from home today" email to your colleagues service.
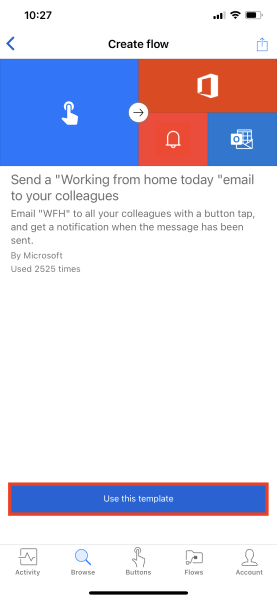
Select Use this template.
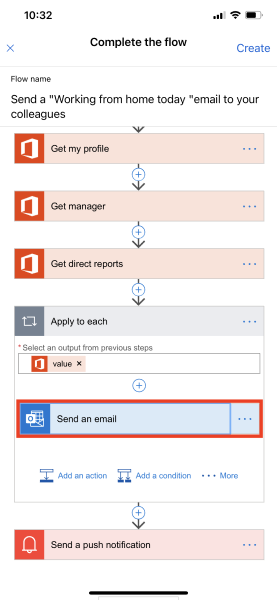
Press the title of the Send an email card to expand your options. This is a part of simultaneous actions.
Select the Subject field, and enter WFH today. Notice that when you selected the Subject field, a list of tokens appeared. While the cursor is still in the Subject field, scroll through the list of tokens, and select Date. Notice that the date token now appears in the Subject field.

Scroll to the Body field and select the default message so that you can add tokens there.
In the Search field, enter Full Address and select the Full Address token.
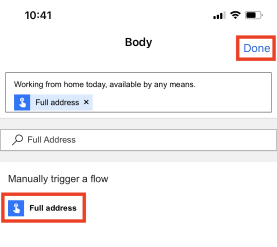
In the upper right corner, select Done.
Select Create.
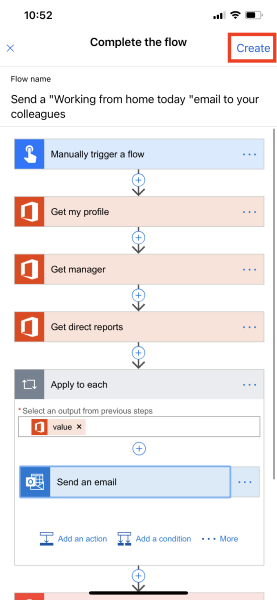
Select Done. Your button flow is now created.
Run the button flow
Note
This button flow will send your current location via email.
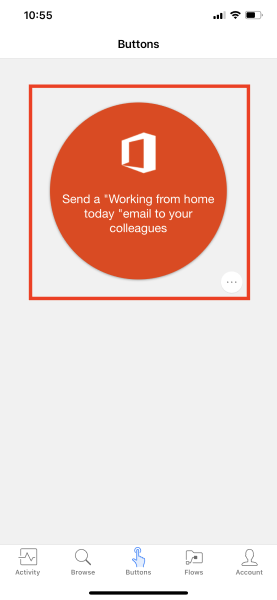
Select the Buttons tab at the bottom of the window. You'll see a list of the buttons that you have permissions to use. Select the button that represents the button flow that you created:
Your device may prompt you to let the button flow access your device's location information. If necessary, press Allow
In a few moments, you'll notice that the email was sent successfully.
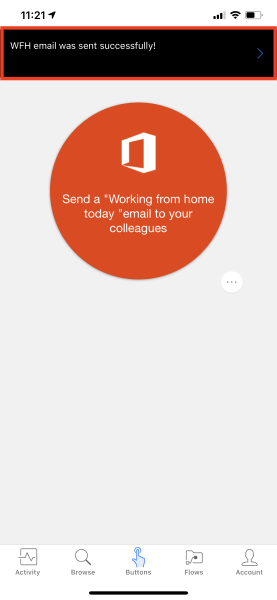
Congratulations! You just created a button flow that uses both the Date and Full Address trigger tokens.
Exercise - Build a flow accepts user input when run
100 XP
6 minutesYou can customize button flows by letting the user provide specific details that will be used when the flow runs.
You can create a button flow either on the Power Automate website or in the mobile app for Power Automate. For this unit, you'll use the website.
In this exercise, our objective is to search for a template available to create a new Outlook task and modify it to match our needs.
Prerequisites
Access to Power Automate.
A basic understanding of Power Automate and experience with creating a flow is recommended.
A smartphone or tablet with the Power Automate app.
Open the template
From your desktop browser, launch Power Automate and sign in using your organizational account.
Select Templates and search Create New Outlook Task.
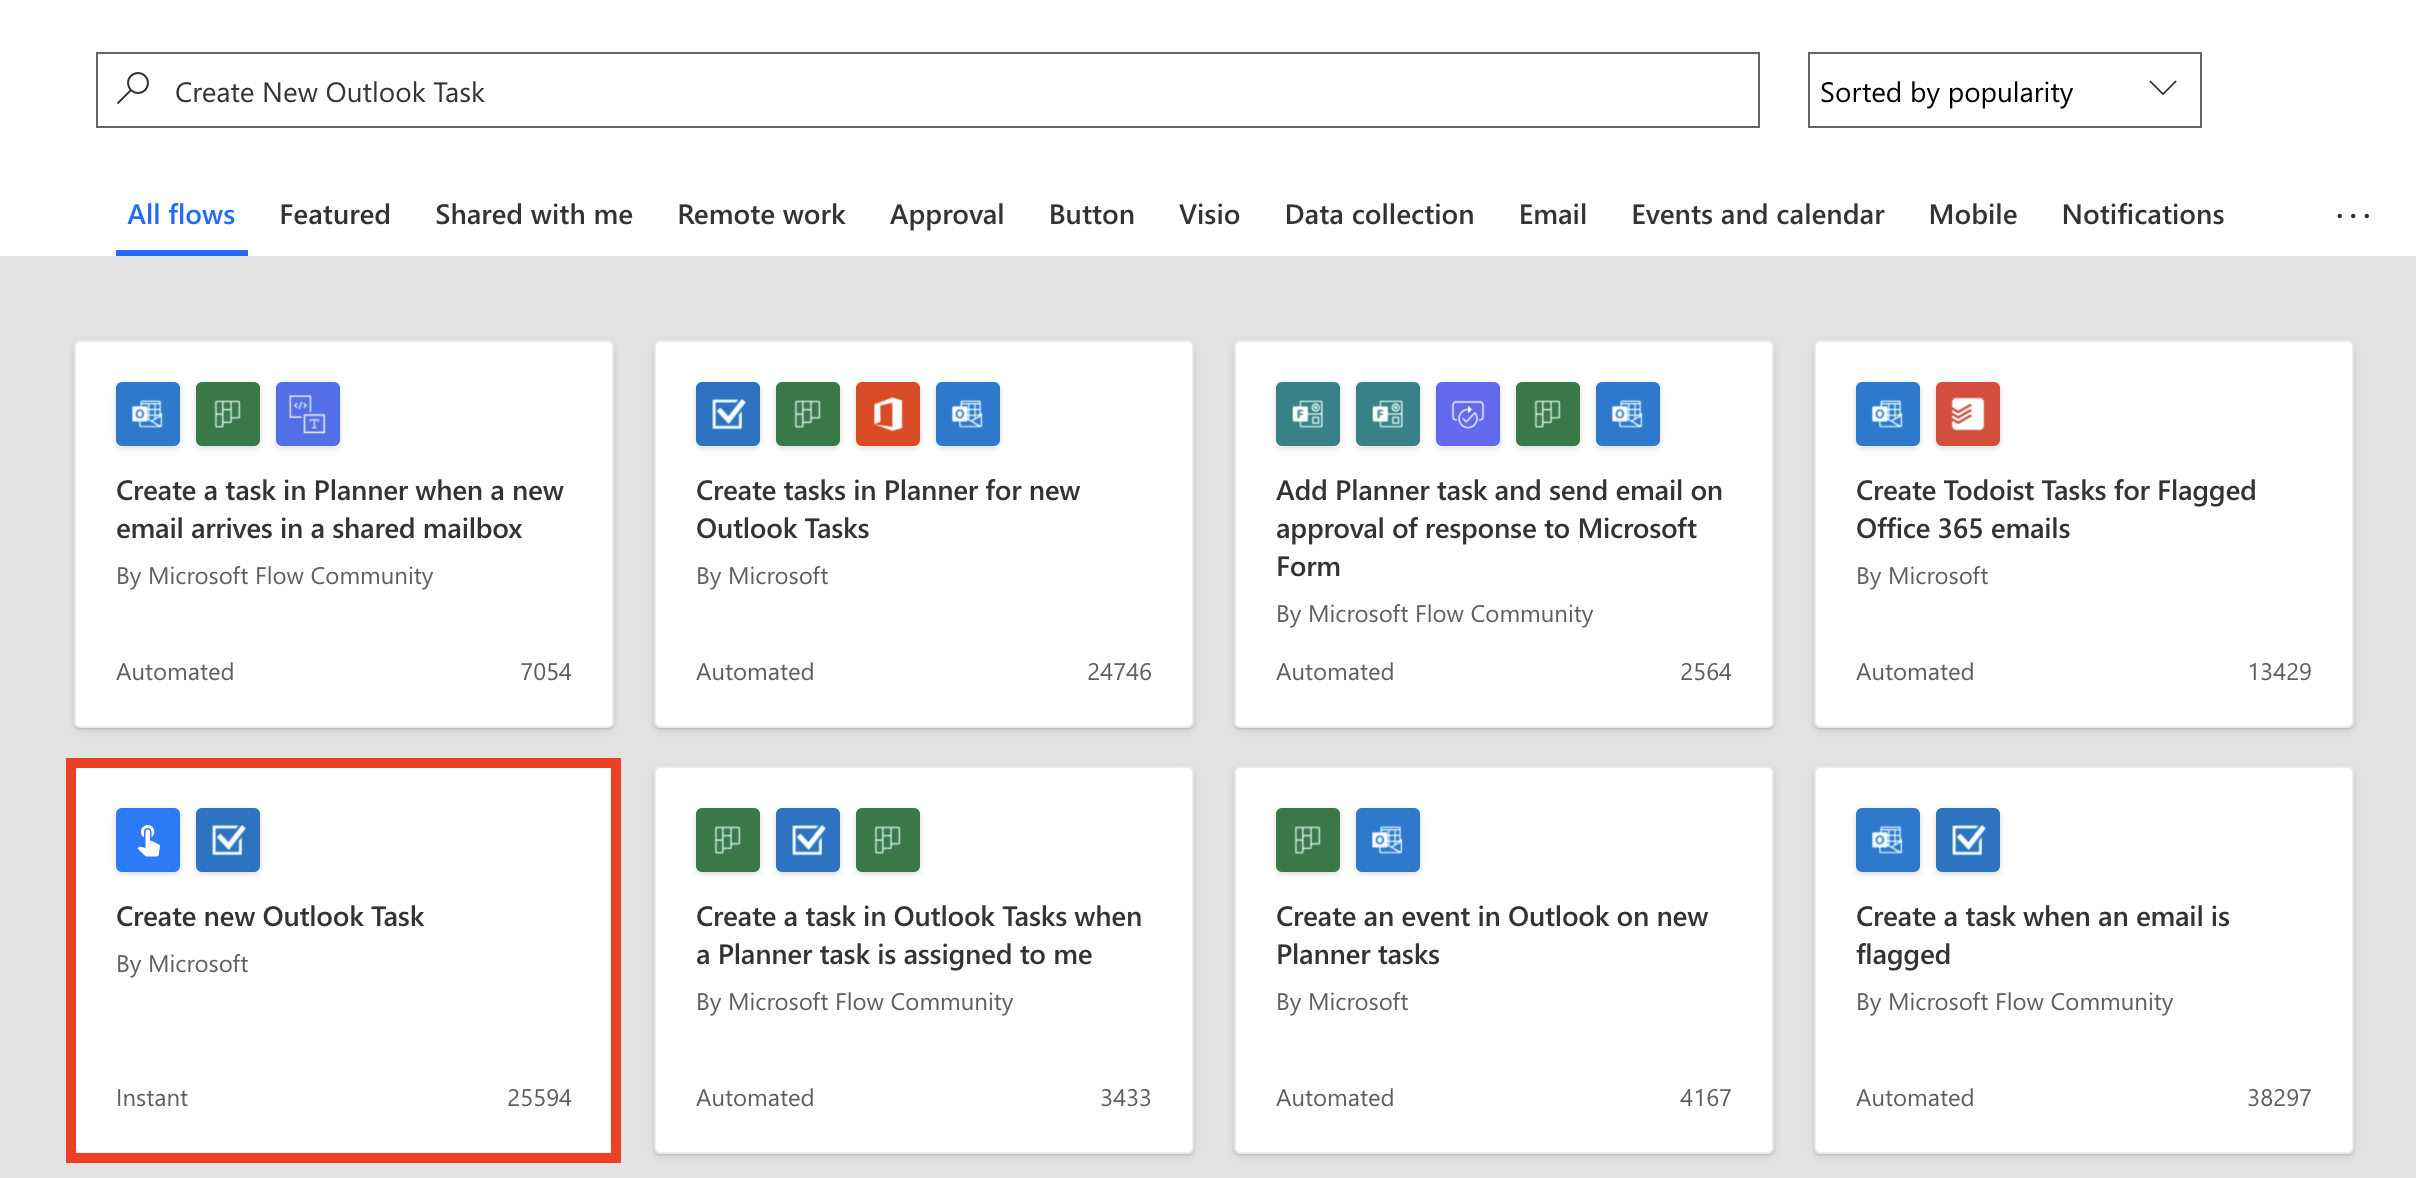
Sign in if you're prompted to do so and select Create Flow.
Customize the user input
You'll notice that this flow already requests more input, but let's add another field.
Select Edit and on the trigger card, select + Add an input.
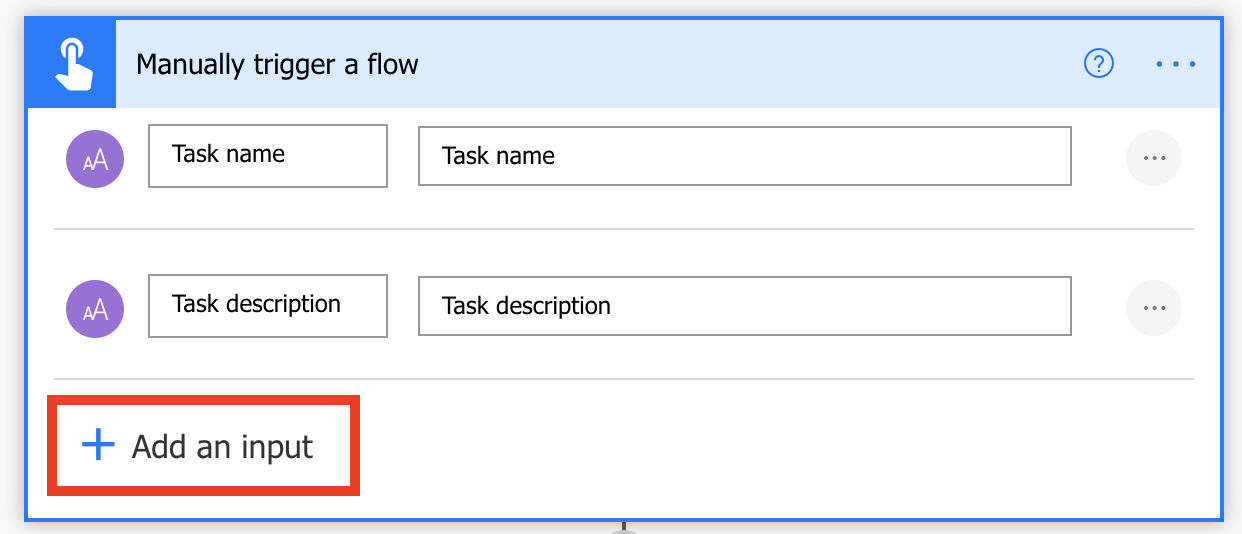
For each custom field that should be available when someone runs your flow, enter values in the Input title and Input description field.
In this example, you'll create one custom input field, Due Date.
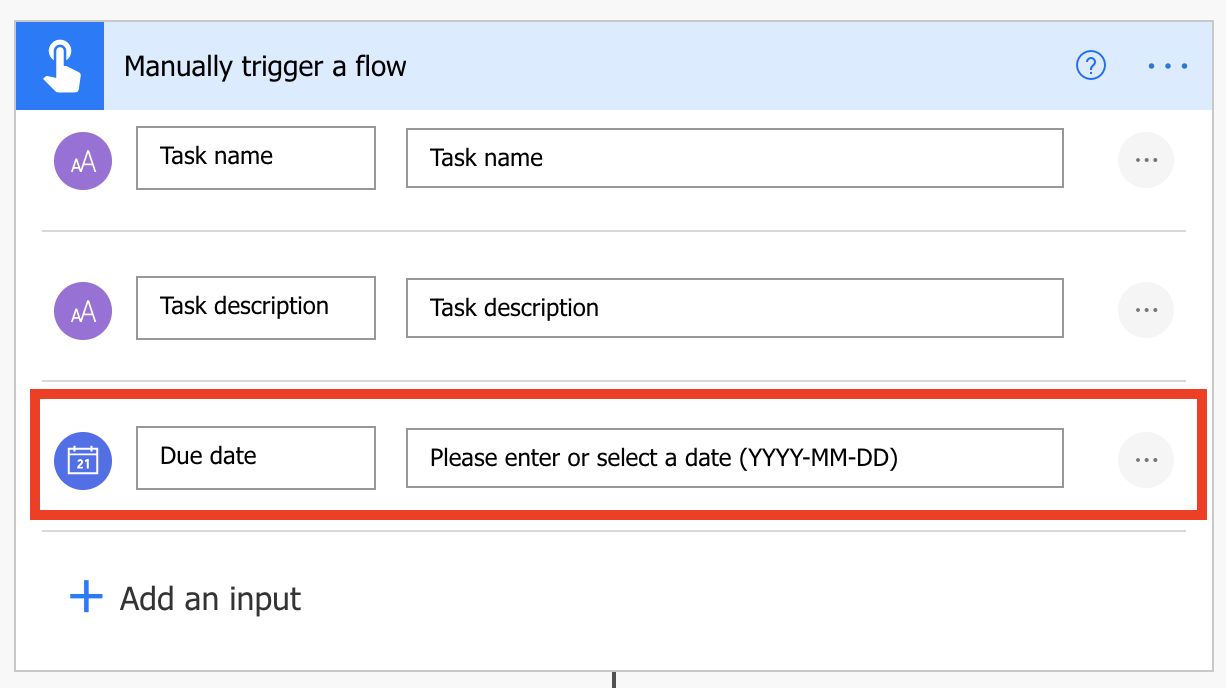
Note
This input does not provide a calendar control for you to select from. You have to add the date in a specific format which is YEAR-MONTH-DAY. Example: 2022-04-04.
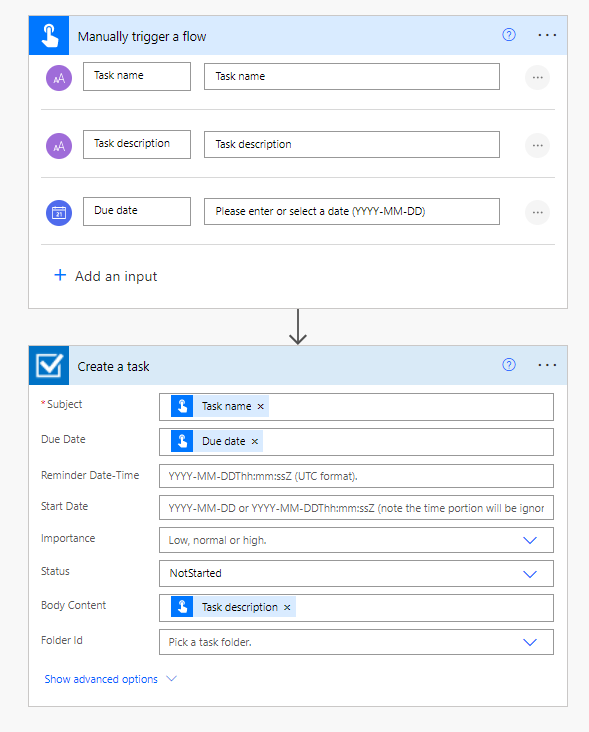
Customize the task
On the Create a task card, select the title bar to expand the card.
For the Due Date field, search for "Due date" in the Dynamic Content search field and then select Due Date.
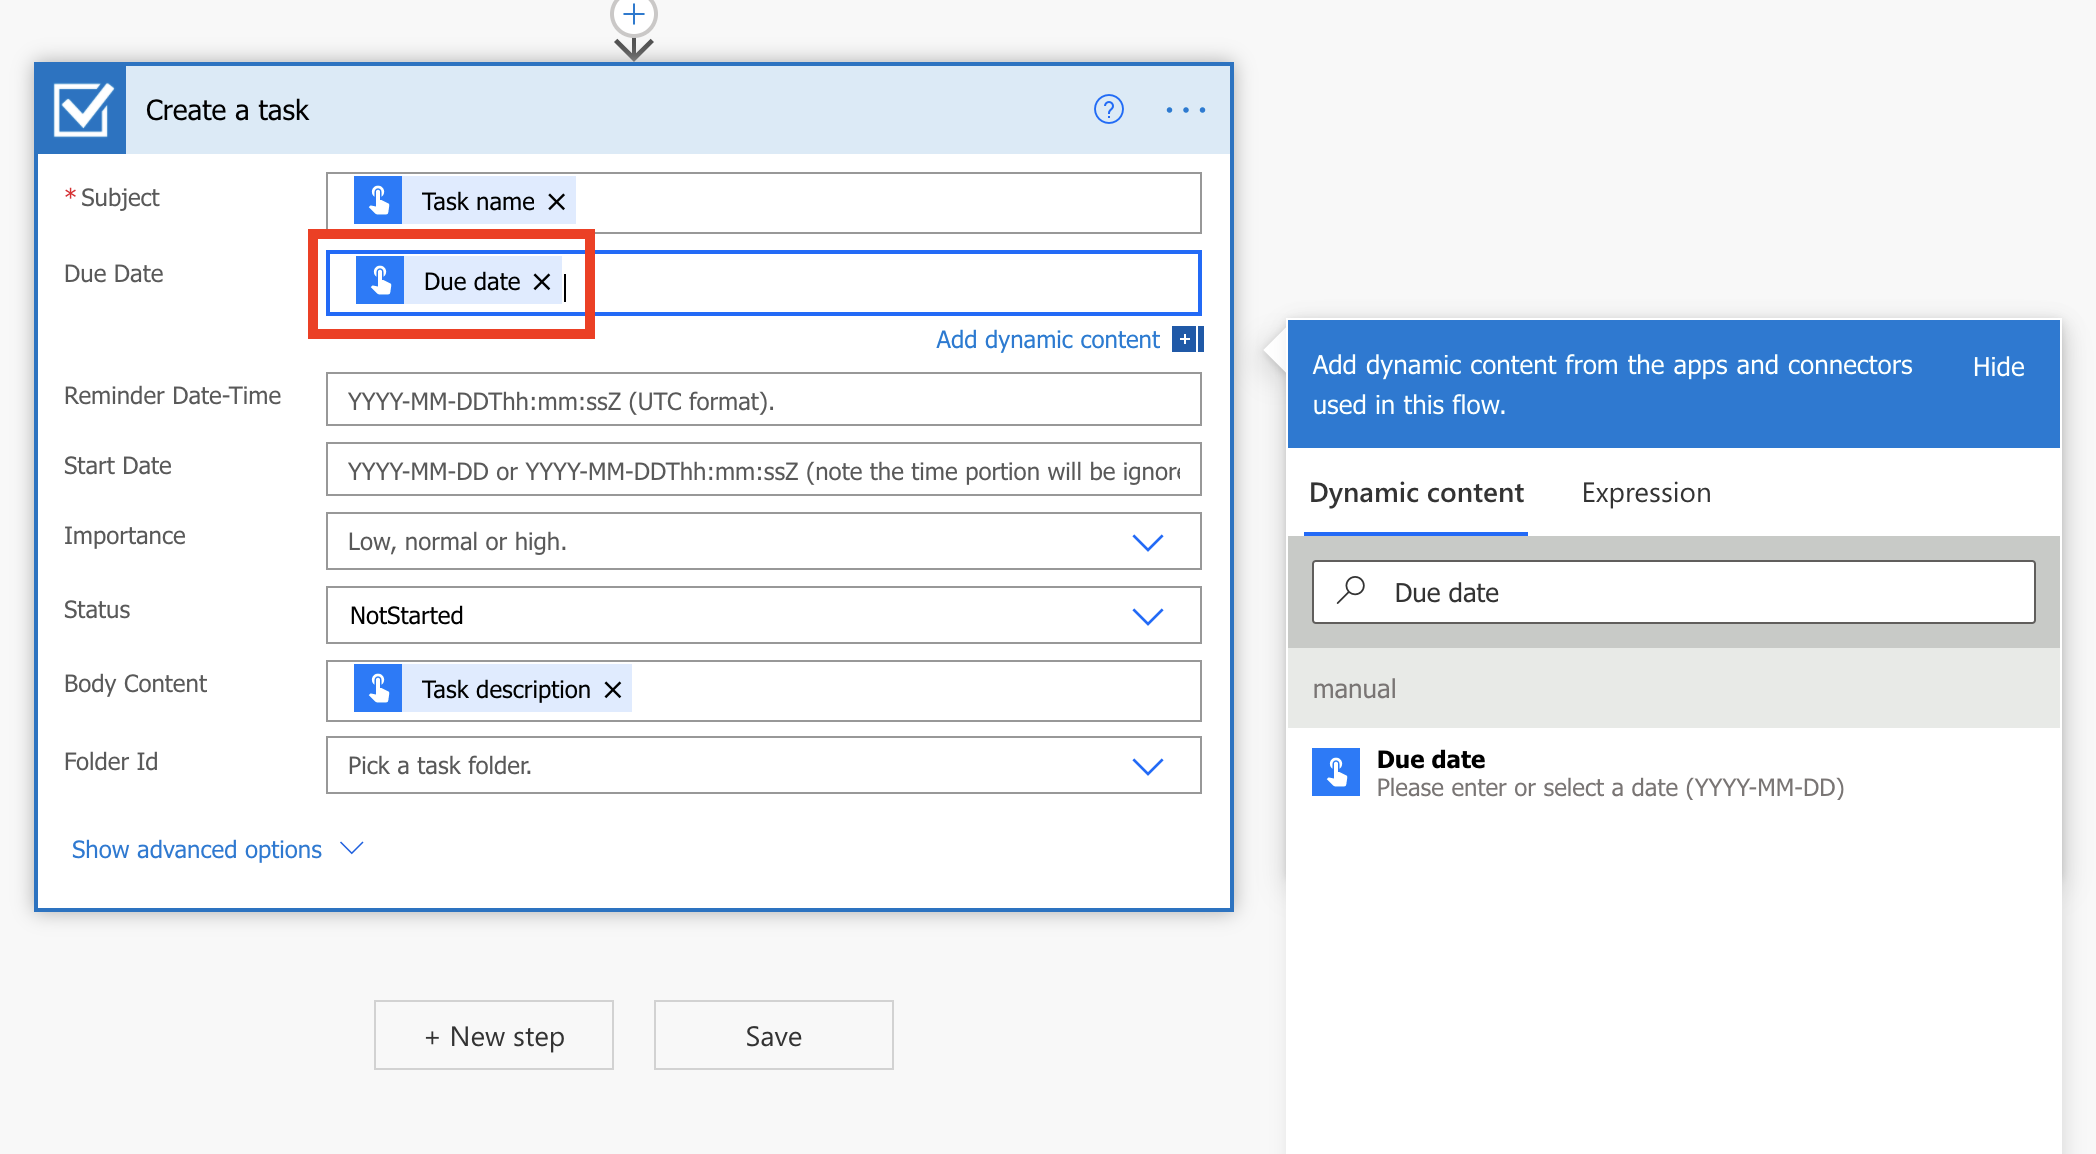
Select Save.
Here is what the completed flow looks like
Run the flow
You'll now use the mobile app for Power Automate to run the button flow that you created. You'll provide all the user input that's needed to create a task with a name, description, and due date.
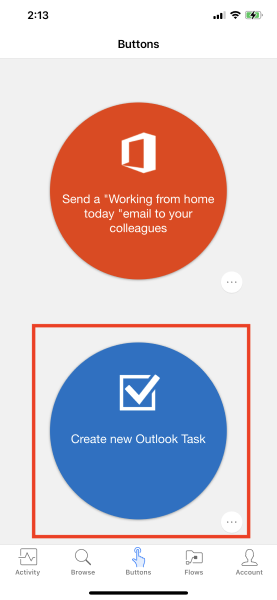
In the mobile app for Power Automate, select the Buttons tab at the bottom of the window, and then select the Create new Outlook Task button.
Enter the requested inputs and select Done.
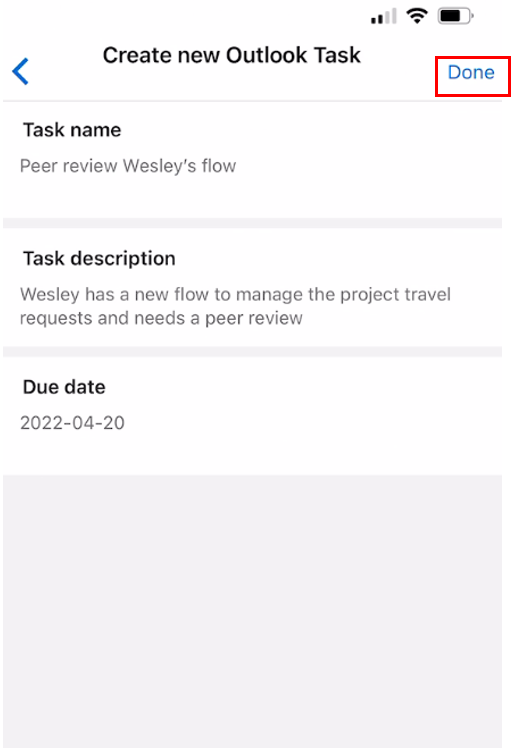
The flow runs.
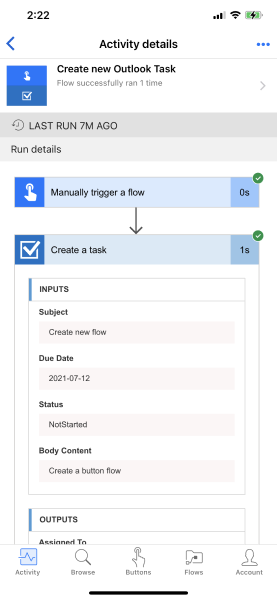
Select the Activity tab at the bottom of the window to view the results.
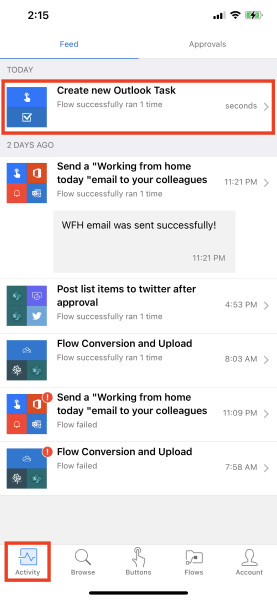
To view the detailed results of the flow run, select the Create new Outlook Task flow at the top of your Activity Feed and then select the Create a task step.
Now you can not only run button flows with information that is already available but also request inputs from the user.
Exercise - Create a flow that blocks time on your calendar
100 XP
3 minutesHave you ever run into a situation where you'll be away from your work device for an unplanned, extended period of time? Wish you had a way to block your work calendar and let your manager know? Then this is the unit for you! In a few clicks, you can modify an existing template, and then have it available to trigger from the Power Automate mobile app.
Prerequisites
Access to Power Automate.
Access to Power Automate mobile app.
A basic understanding of Power Automate and experience with creating a flow is recommended.
Open the template
Launch Power Automate and sign in using your organizational account.
Select Templates and search block calendar.
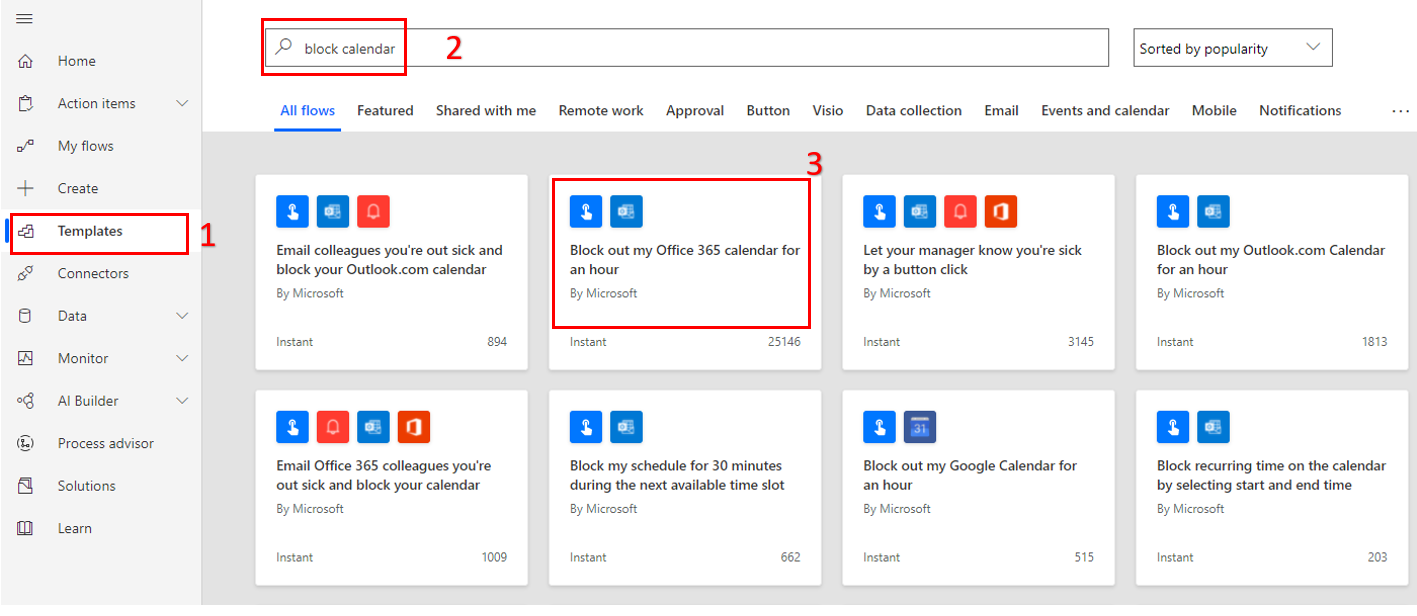
Select the Block out my Office 365 calendar for an hour tile.
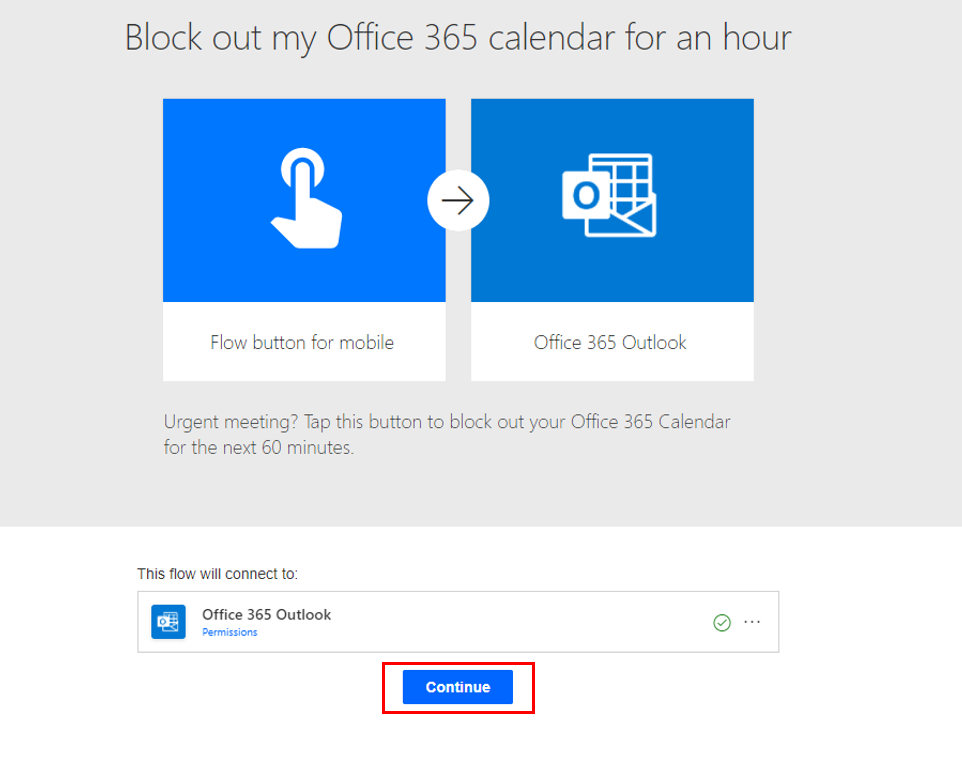
Select Continue.
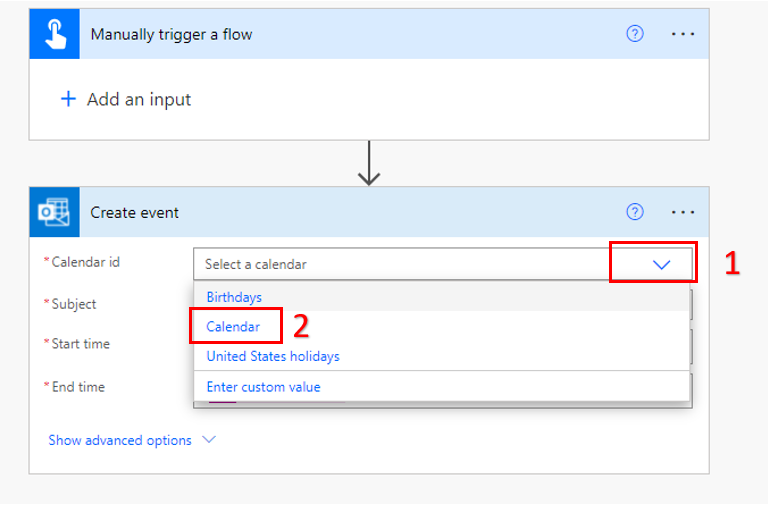
Select the drop-down available for the Calendar id and select Calendar.
Next, we're going to send an email notification to our manager, to do this we'll use the combination of Get my profile (V2) and Get manager (V2).
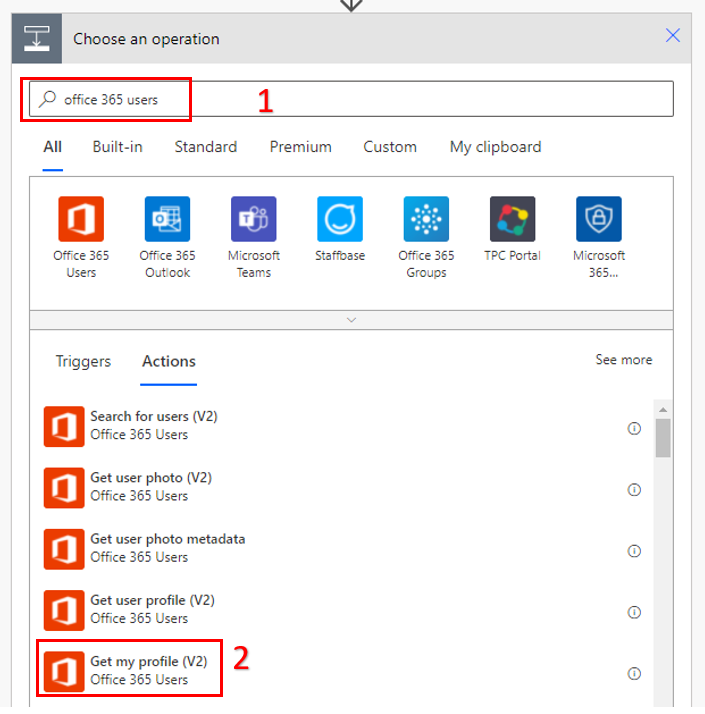
Select + New step and search for Office 365 Users and select the Get my profile (V2) action. This action will provide us the User Principal Name.
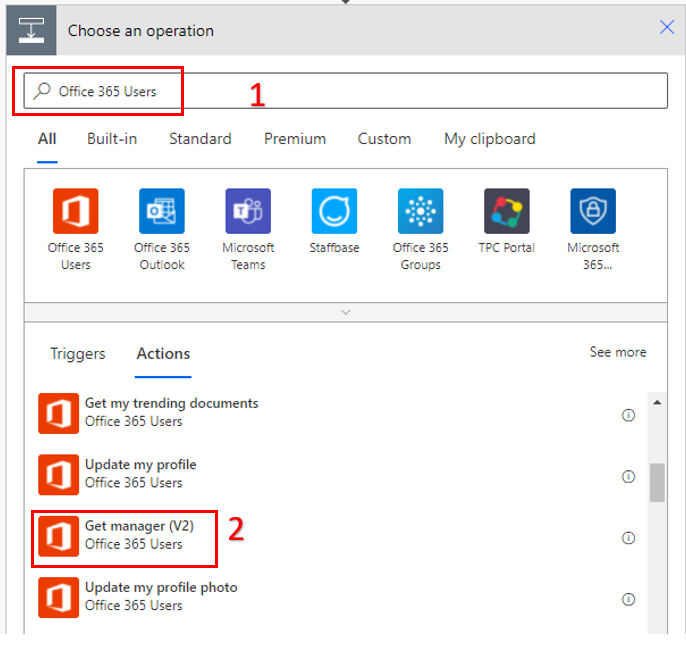
Select + New step and search for Office 365 Users and select the Get manager (V2) action.
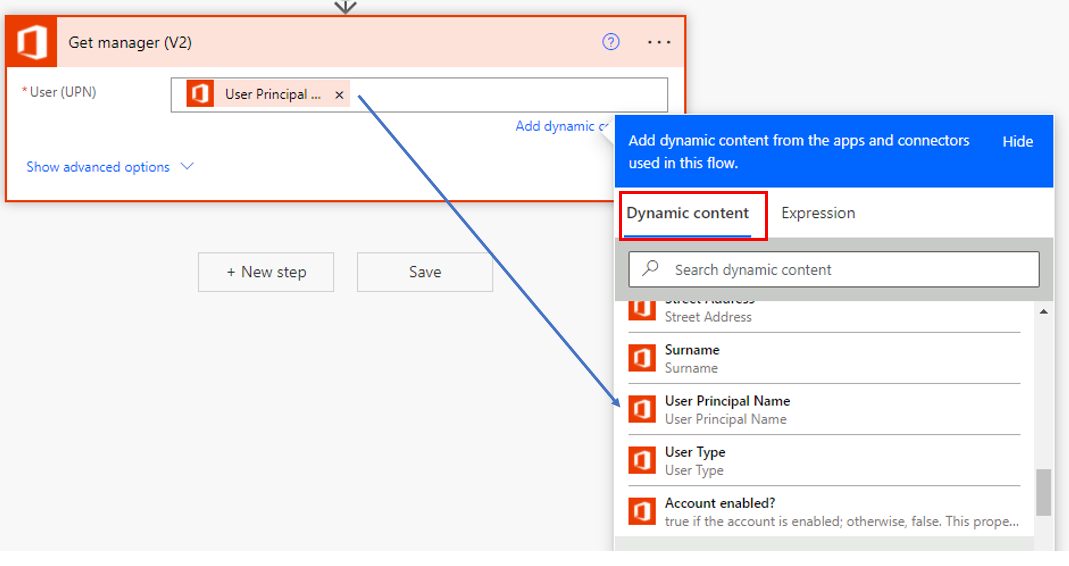
Click inside the User (UPN) file. In Dynamic content, select UPN. Make sure you select the UPN that is under the Get my profile (v2)
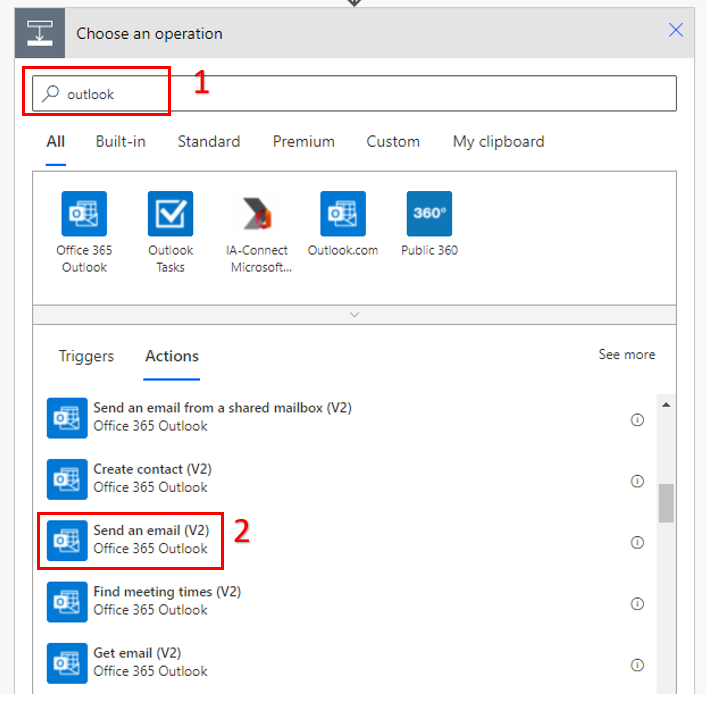
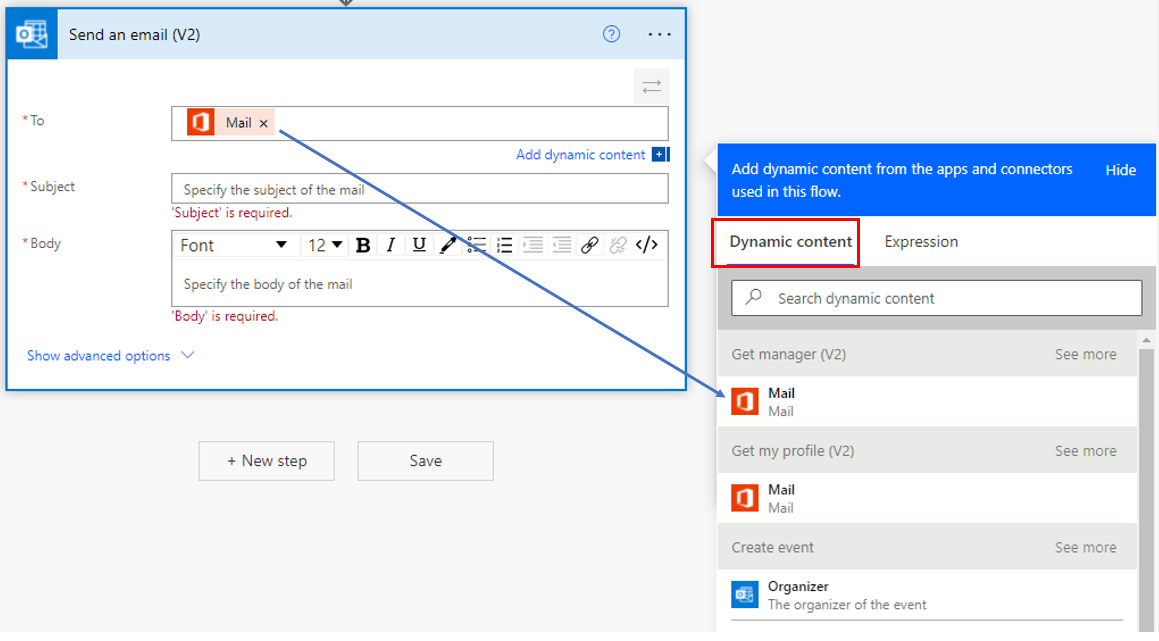
Finally, select + New step and search for Outlook and select the Send an email (V2) action.
Click inside the To field and in Dynamic content select Mail under the Get manager (V2).
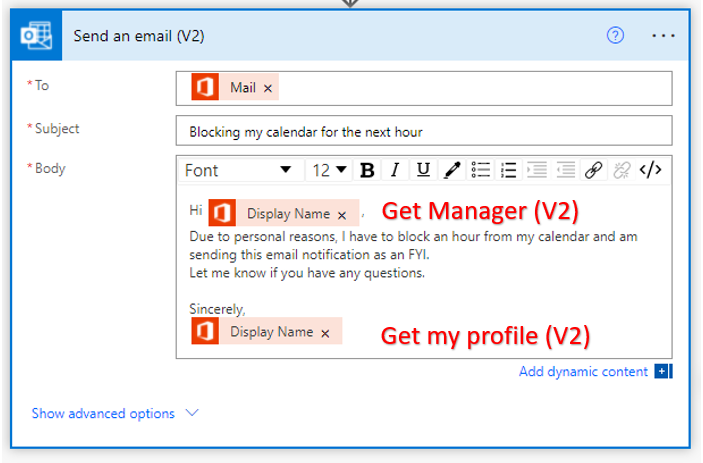
Finally, you can add your desired text in the Subject and the Body section. Here's an example:
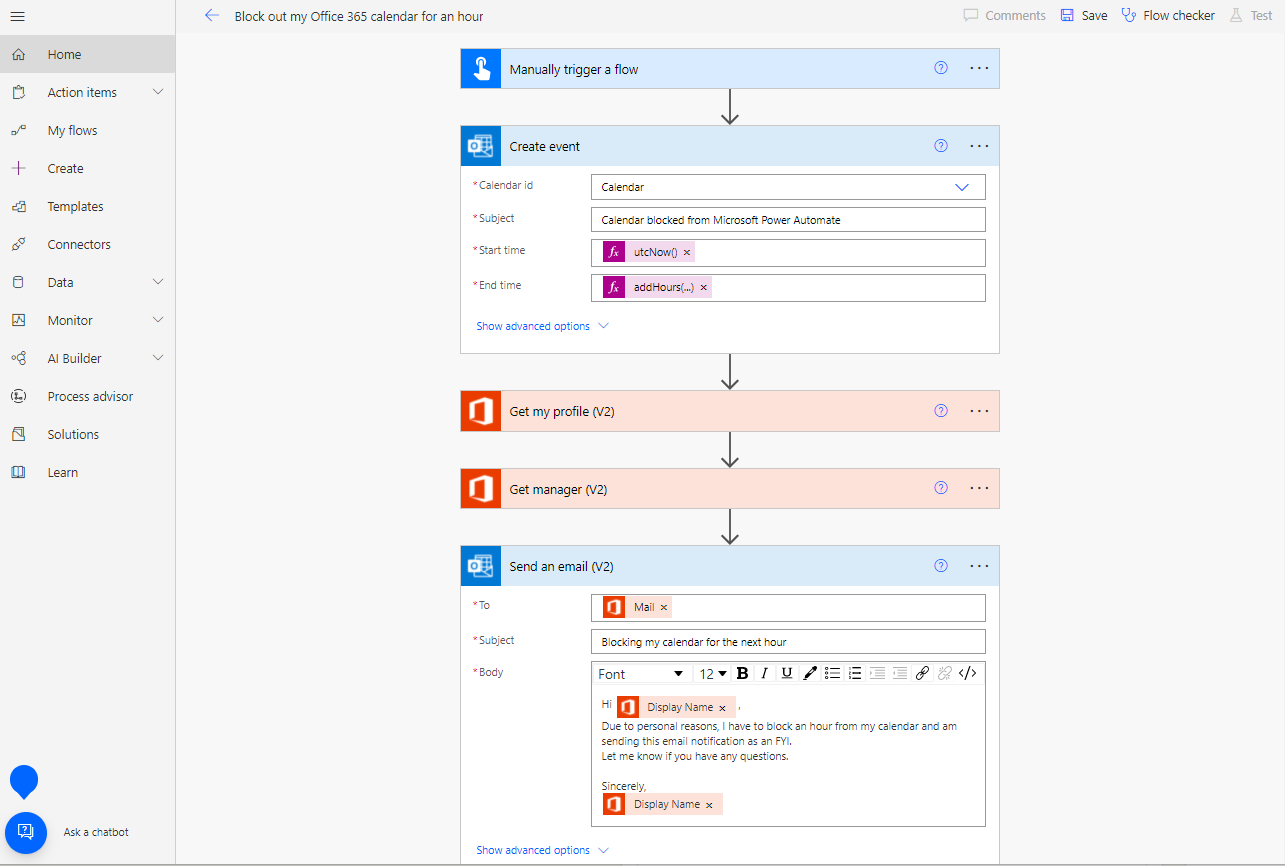
Here's an overview of the entire flow:
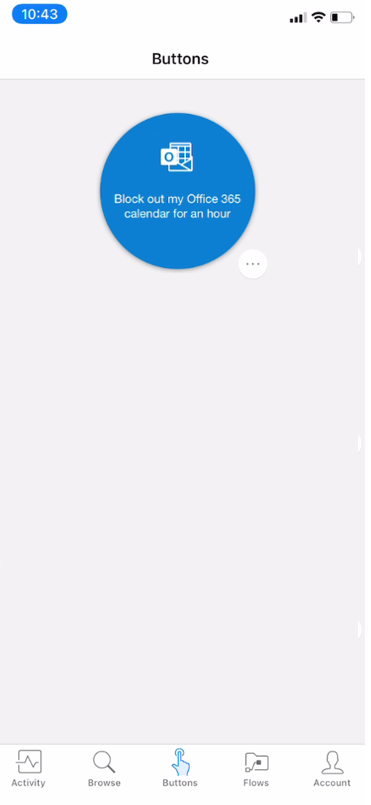
And here's what the virtual button looks like in the Power Automate mobile app:
Check your knowledge
200 XP
6 minutesAnswer the following questions to see what you've learned.
1.
What user information is available with the button trigger?
User name, manager email, department, and phone number.
User name, email, department, and phone number.
User name, user email, full address, latitude, longitude, and timestamp.
The user button information provides the current location of the user where the button is triggered.
2.
What is the most commonly used data source to store your personal documents?
Microsoft OneDrive
Microsoft's OneDrive and OneDrive for Business is the most commonly used data source to store personal information.
SharePoint
Dataverse
Excel
3.
When creating Button Flows you can use trigger tokens to capture which of the following information?
Phone Number
Date of Birth, phone number and email address
GPS, date and time, user name and email address
GPS, date and time, user name and email address are available information.
Full address, manager information, and phone number


 Bengali (Bangladesh) ·
  English (United States) ·