
ARTICLE AD
Introducing Power Automate
100 XP
10 minutesWelcome to Power Automate! In this module, you'll learn how to build flows.
If you're a beginner with Power Automate, this module will get you going. If you already have some experience, this module will tie concepts together and fill in the gaps.
Learning objectives
In this module, you will:
Learn what Power Automate is and how it can be usedCreate a flow that runs on a scheduleCreate a flow that automatically saves email attachmentsShare a flow that your team can useTroubleshoot flowsWhat is Power Automate?
Power Automate is an online workflow service that automates actions across the most common apps and services. For example, you can create a flow that adds a lead to Microsoft Dynamics 365 and a record in MailChimp whenever someone with more than 100 followers tweets about your company.
When you sign up, you can connect to more than 500 services, and can manage data either in the cloud or in on-premises sources like SharePoint and Microsoft SQL Server. The list of applications you can use with Power Automate grows constantly.
What can you do with Power Automate?
You can use Power Automate to automate workflows between your favorite applications and services, sync files, get notifications, collect data, and much more.
For example, you can automate these tasks:
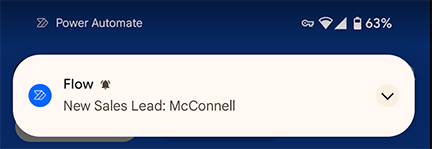
Instantly respond to high-priority notifications or emails.Capture, track, and follow up with new sales leads.Copy all email attachments to your OneDrive for Business account.Collect data about your business, and share that information with your team.Automate approval workflows.A common use of Power Automate is to receive notifications. For example, you can instantly receive an email or a push notification on your phone whenever a sales lead is added to Dynamics 365 or Salesforce.
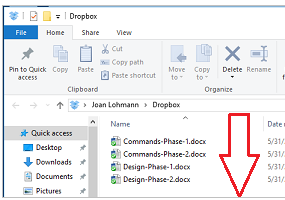
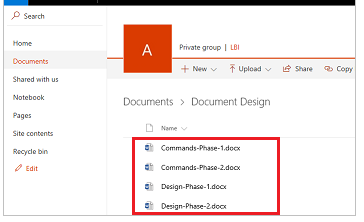
You can also use Power Automate to copy files. For example, you can ensure that any file that's added to Dropbox is automatically copied to SharePoint, where your team can find it.
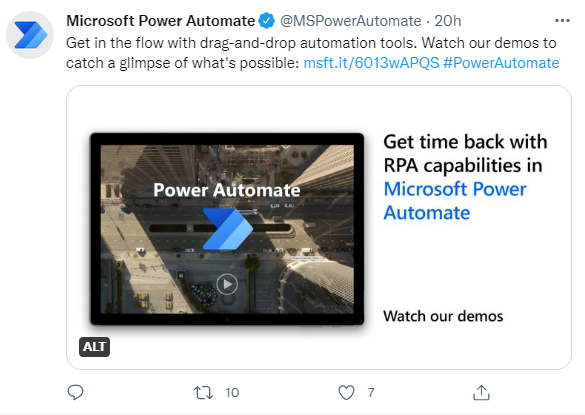
You can monitor what people are saying about your business by creating a flow that runs whenever someone sends a tweet with a certain hashtag. The flow can add details about each tweet to a Facebook post, a SQL Server database, a Microsoft Lists list, or even a Microsoft Excel file that's hosted on OneDrive for Business–-whichever service works for you.
You can create actions to connect the data you collect to Microsoft Power BI, spot trends in that data, and ask questions about it.
The following example shows a flow that saves tweets with the hashtag #PowerAutomate to an Excel file.

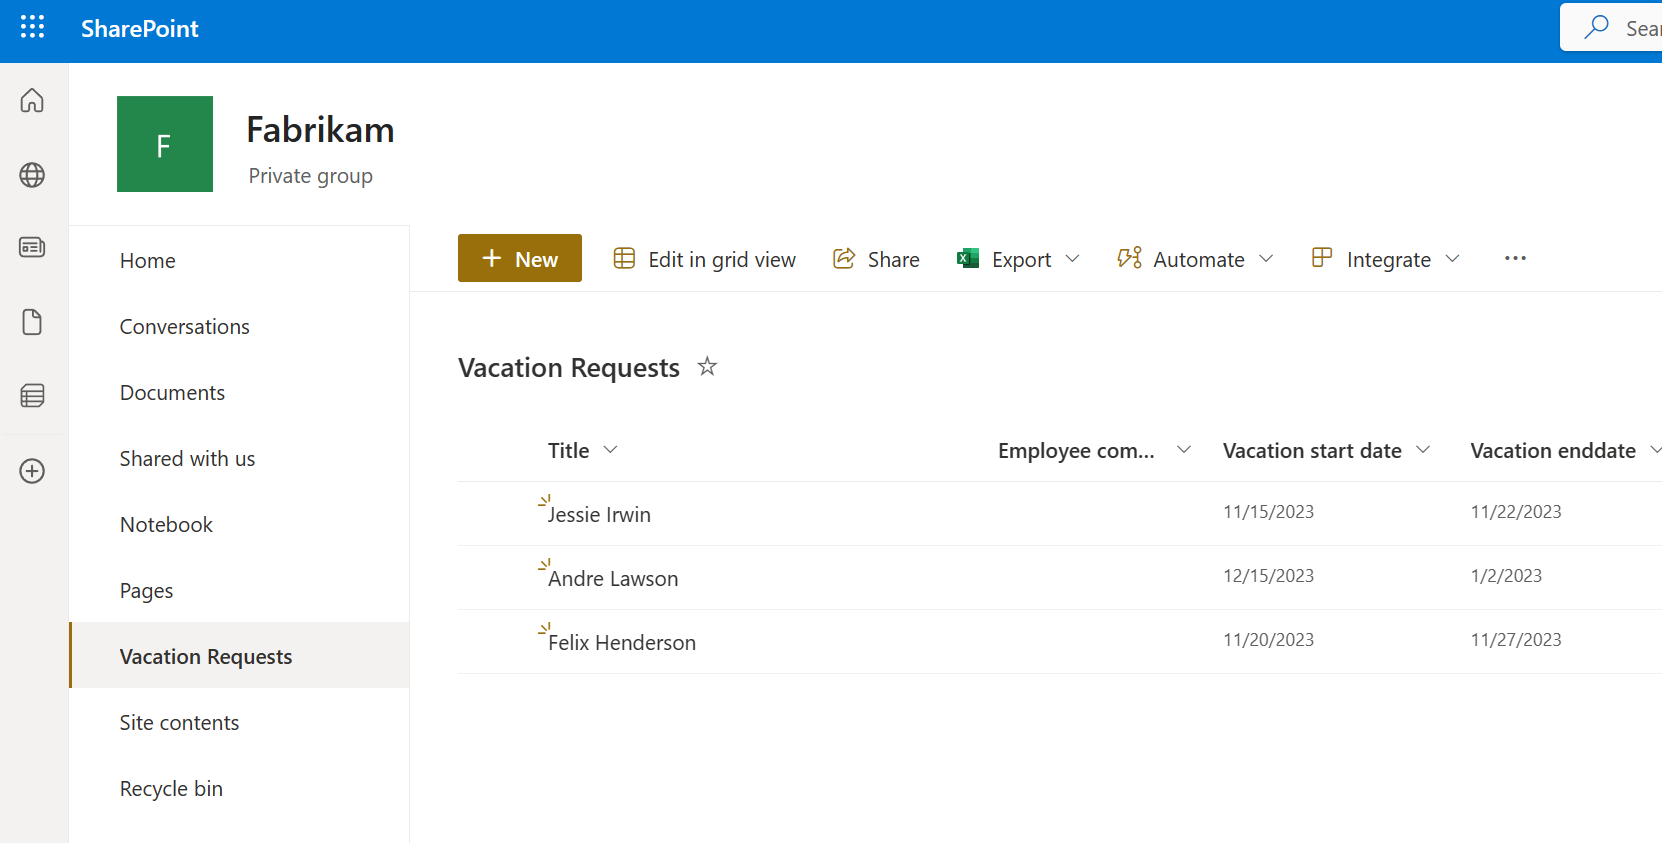
Also, you can automate approval loops for things like vacation requests on a list.
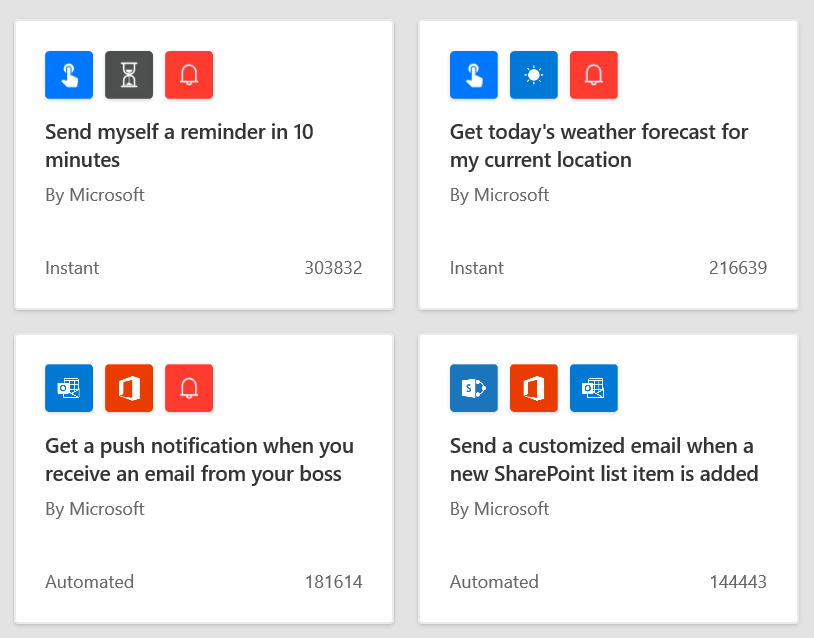
For more ideas, browse our list of templates. Templates help you build flows by making a few configuration changes. For example, you can use templates to easily build flows to send yourself weather forecasts, reminders at regular intervals, or phone notifications whenever your manager sends you mail.
Have an idea for a flow that you don't see in the list? Create your own from scratch and, if you want, share it with the community!
Where can I create and administer a flow?
You can create a flow and perform administrative tasks in a browser or, if you download the Power Automate mobile app, on your phone.
Here are some of the tasks you can perform with the mobile app:
Turn flows on or off from wherever you are.See when a flow has failed.Review detailed run history reports.View and filter runs by notification type.A brief tour of Power Automate
Let's jump into Power Automate, and we'll show you around. We have tons of information for you to learn about how to use Power Automate.

When you sign in to Power Automate, you'll find these options:
Approvals, where you can manage approvals and business process flows.My flows, where your flows reside.Create, where you start a new flow.Templates, where you can take a look at some of the most popular templates. These should give you some great ideas for flows you want to try.Connectors, where you can connect from one service to another.Data, where you can access entities, connections, custom connectors and gateways.Monitor, where you can view the activity of all your cloud and desktop flows.AI Builder, where you can build AI models and view the models you created or that have been shared with you.Process advisor, where you can create processes to help your organization better understand places to streamline workflows.Solutions, where you can manage your solutions.Learn, where you can find information that will help you quickly ramp up on Power Automate.For now, let's focus on the ? menu next to your sign-in, which has these options:
Documentation is where our advanced topics reside. If you want to really understand a feature or function, you can do a deep dive here to figure out things.Learn has learning paths to guide you through using Power Automate, all the way from beginning techniques to advanced scenarios.Support is a great landing place to find help.Roadmap is where you can get a glimpse into what will be made in the next product update.Community is a place to plug into and find out how other people use Power Automate.Give Feedback taps into a community of power users, and is where you can send comments and questions to developers and other experienced users.Blog keeps you up to date about the most recent developments and releases in the Power Automate ecosystem.Desktop flows provides an introduction to Power Automate for desktop.Pricing can help you choose the right plan for you or your business.Power Automate for desktop is where you can download Power Automate for desktop and install it on your machine.Power Automate for Mobile provides information about the mobile app and the platforms it's available on.Data Gateway provides an overview of the on-premises data gateway.What's next?
Let's take a look at the different types of flows that are available in Power Automate.
Exercise - Create your first flow
100 XP
8 minutesIn the previous unit we learned about the key concepts such as templates, connectors, actions and conditions. Here we'll put all of those concepts into practice by building your first flow.
Since it can be time consuming to search for attachments in your emails, creating a flow can save you time by storing all your email attachments in a folder in your Microsoft OneDrive for Business account.
If you would like to see the process of creating flows, watch the following video.
Important concepts in Power Automate
Keep these concepts in mind when building flows:
Every flow has two main parts: a trigger, and one or more actions.You can think of the trigger as the starting action for the flow. The trigger can be something like a new email arriving in your inbox or a new item being added to a list in Microsoft Lists.Actions are what you want to happen when a trigger is invoked. For example, the new email trigger will start the action of creating a new file on OneDrive for Business. Other examples of actions include sending an email, posting a tweet, and starting an approval.These concepts will come into play later when you build your own flows from scratch.
Exercise - Create recurring flows
100 XP
5 minutesIn this unit, you'll learn how to build prescheduled flows by using a trigger called recurrence. You'll build a flow for the Contoso marketing team that automatically pulls customer email addresses from a Microsoft Excel workbook on Microsoft OneDrive. You'll then set up the flow so that any new email addresses that anyone adds to the workbook are added to a MailChimp customer list once a day.
Prerequisites
For this scenario, you’ll need to make an Excel file with a table that contains the following columns: ContactEmail, FirstName, and LastName. Save the Excel file in OneDrive for Business. You'll connect to this file in step 9.
Note
Be sure to format your Excel data as a table. This is the table referenced in step 11.
Here’s what the Excel table looks like 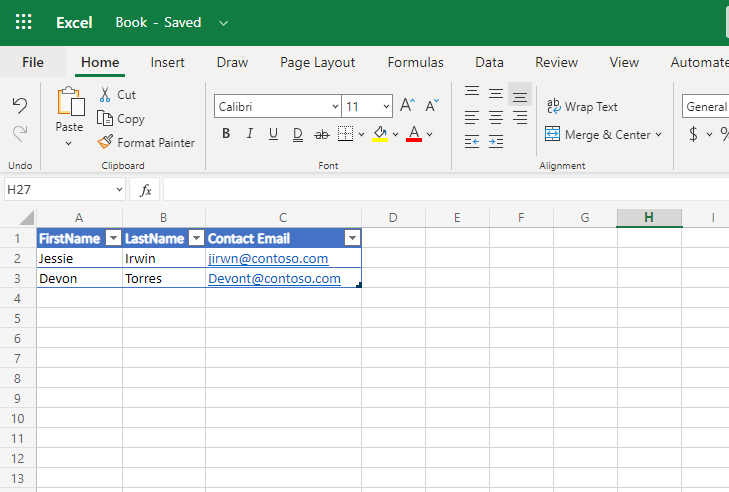
Create a scheduled flow
Sign in to Power Automate by using your organizational account.
Select My flows.
Select New, and then select Scheduled cloud flow.
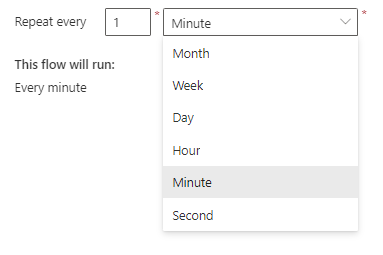
By default you have the option to repeat every 1 minute, however, you have the option to change it and the options available are Minute, Week, Day, Hour and Second.
Note
Be mindful of the repeating module you select and how often you would like the flows to run.
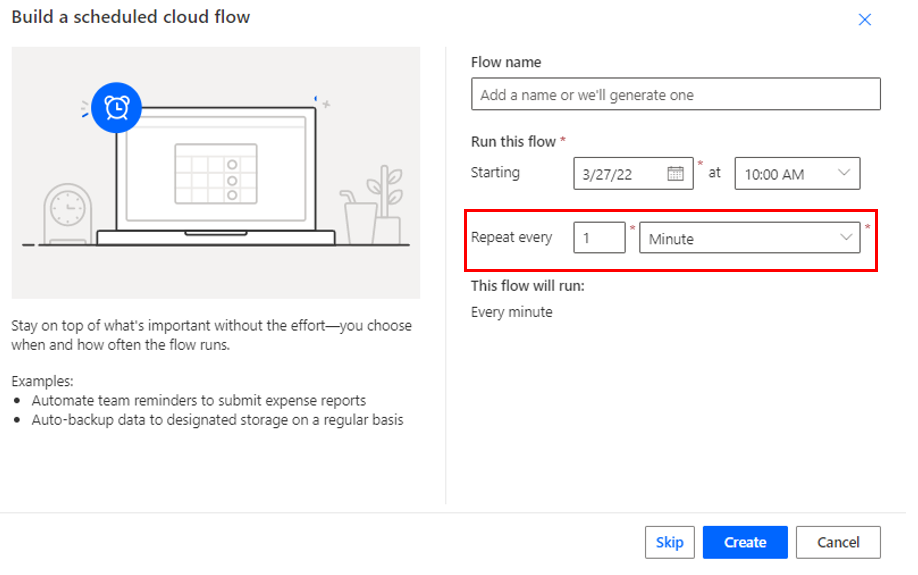
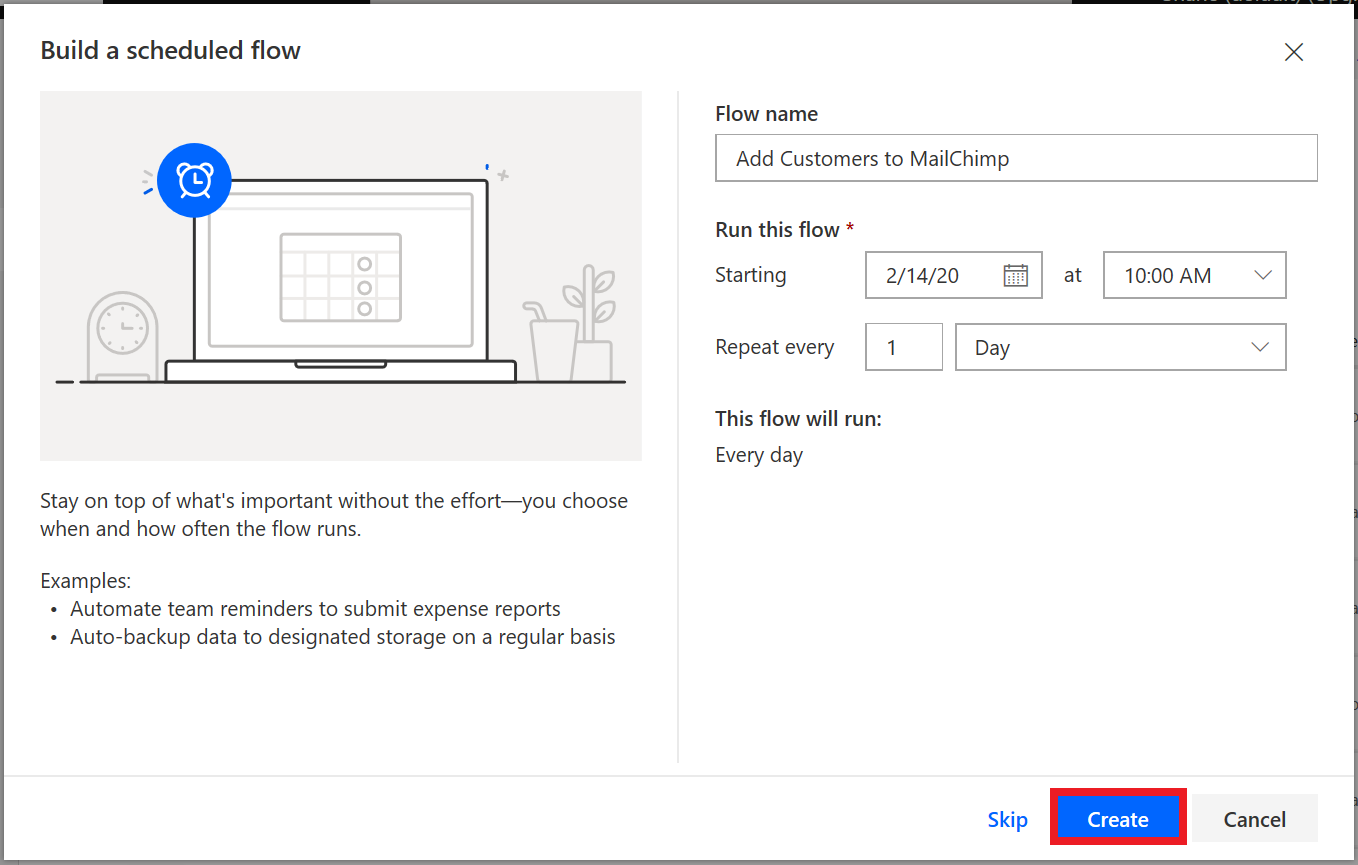
Name your flow and under Run this flow set the flow to repeat every one Day.
Select Create.
Select New step, to add an action.
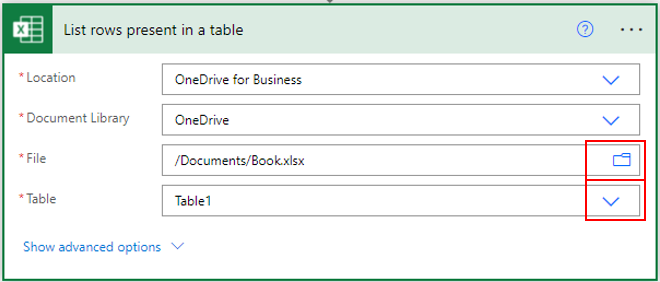
In the search field, enter excel, select the Excel Online (Business) service, and then select the List rows present in a table action.
In the Location field, select the drop-down arrow and select OneDrive for Business.
In the Document Library field, select the drop-down arrow and select OneDrive.
In the File name field, select the folder button, and then select the Excel file to use.
In the Table name box, select the drop-down arrow, and then browse to and select the worksheet to use.
Select New step, and then select Add an action.
In the search field, enter chimp, select the MailChimp service, and then select the MailChimp - Add member to list action.
Note
MailChimp is a premium connector. Depending on your Power Automate license, you might need to sign up for a trial to use this connector. A MailChimp account is required to complete the following steps where a one-time sign-in is required.


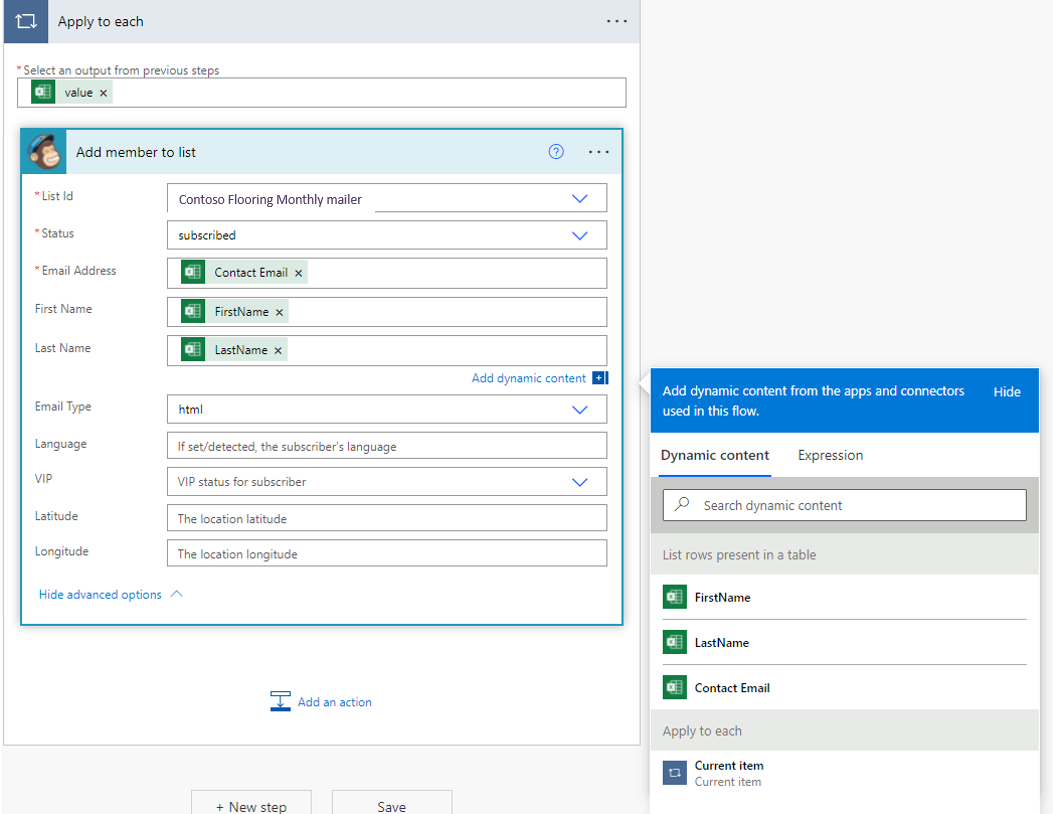
In the List Id field, select the desired MailChimp mailing list. In the Status field, select subscribed.
In the Email Address field, use the dynamic content feature to add the ContactEmail field.
Your Add member to list action will automatically be added inside an Apply to each. This location is by design and has occurred because multiple members need to be added. You’ll notice Value is added to Select an output from previous stages.
Use the dynamic content feature to fill in the First name and Last name fields.
And there you have it!
This flow will now run once a day. It will:
Get the new rows from the Excel worksheet
Grab the email address and name from each row
Enter the email address and name in the Contoso MailChimp mail list
Save you both time and money
Here’s what a successful flow run looks like 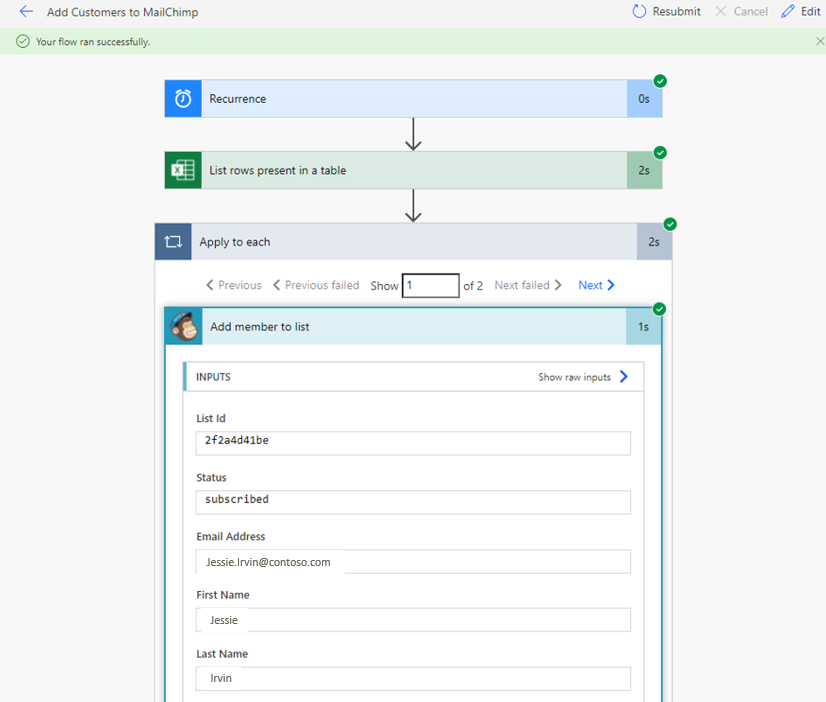
Exercise - Monitor incoming emails
100 XP
5 minutesYou can create a flow that automatically performs one or more actions after it's triggered by an event. For example, the flow can monitor your Outlook inbox and when an email with a specific subject line and email address arrives, the flow will take the attachment and save it to a SharePoint library.
Prerequisites
Microsoft Office 365
Specify the SharePoint site and library
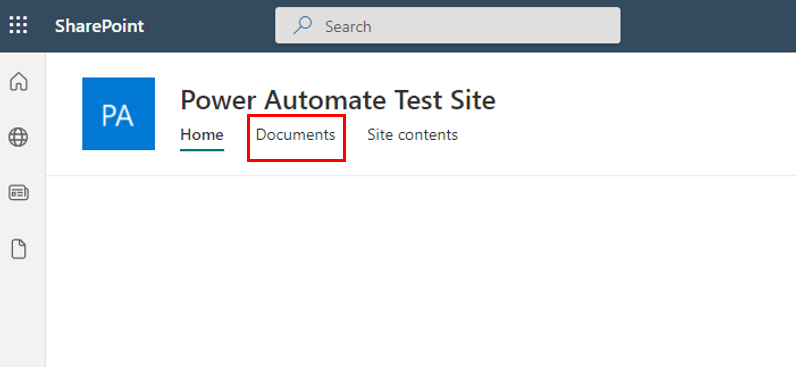
You can use any SharePoint site of your choice and can also use an existing library.
In this scenario, we'll use the following SharePoint site and its default Documents library, which is available out-of-box.
Specify an event to start the flow
First, you must select the trigger (event) that starts the flow.
Sign in to Power Automate by using your organizational account.
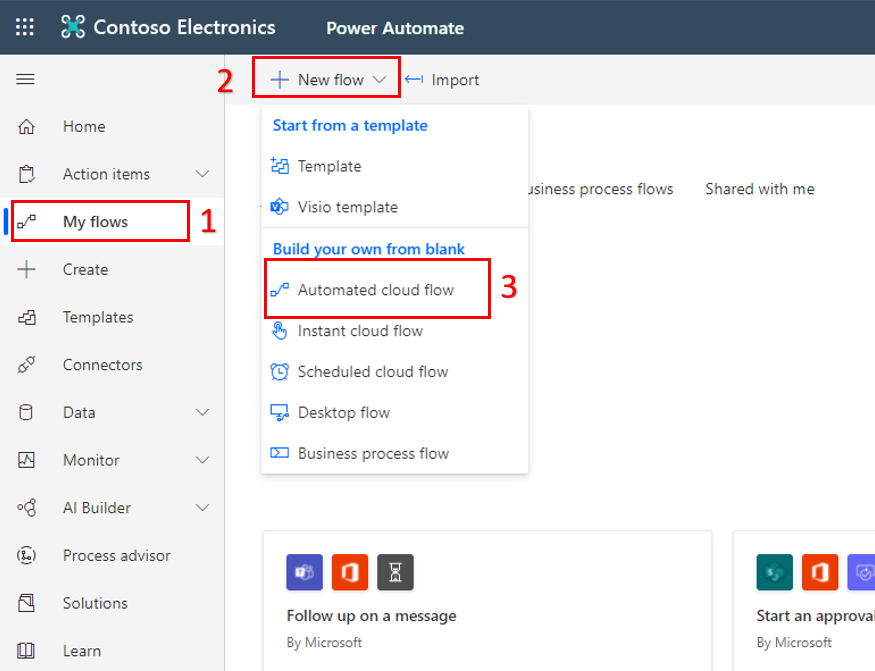
Select My flows.
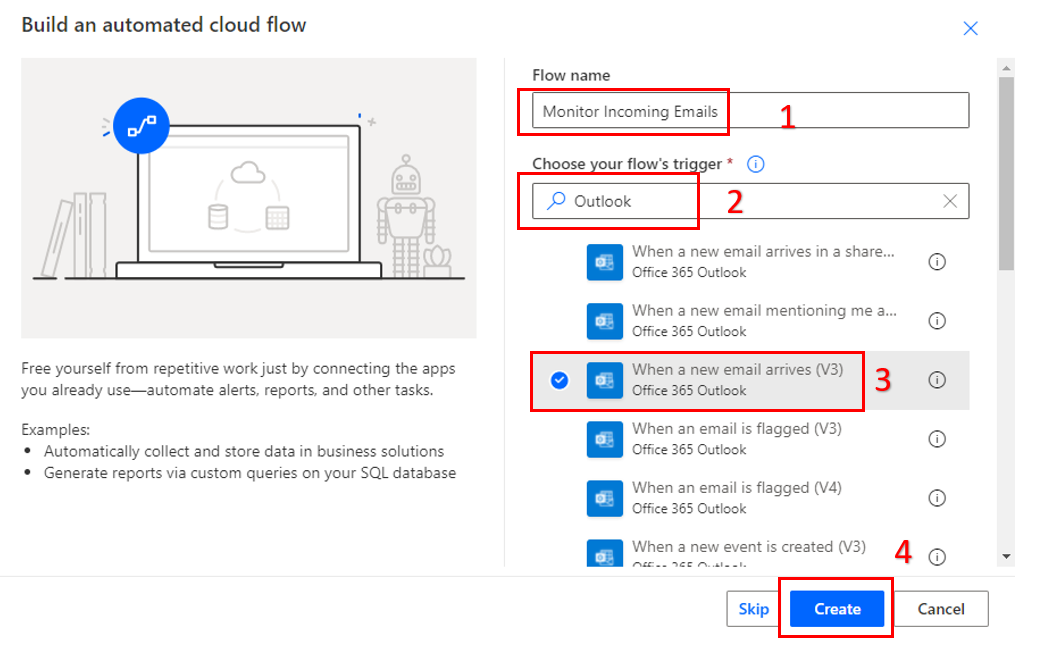
Select New flow, and then select Automated cloud flow.
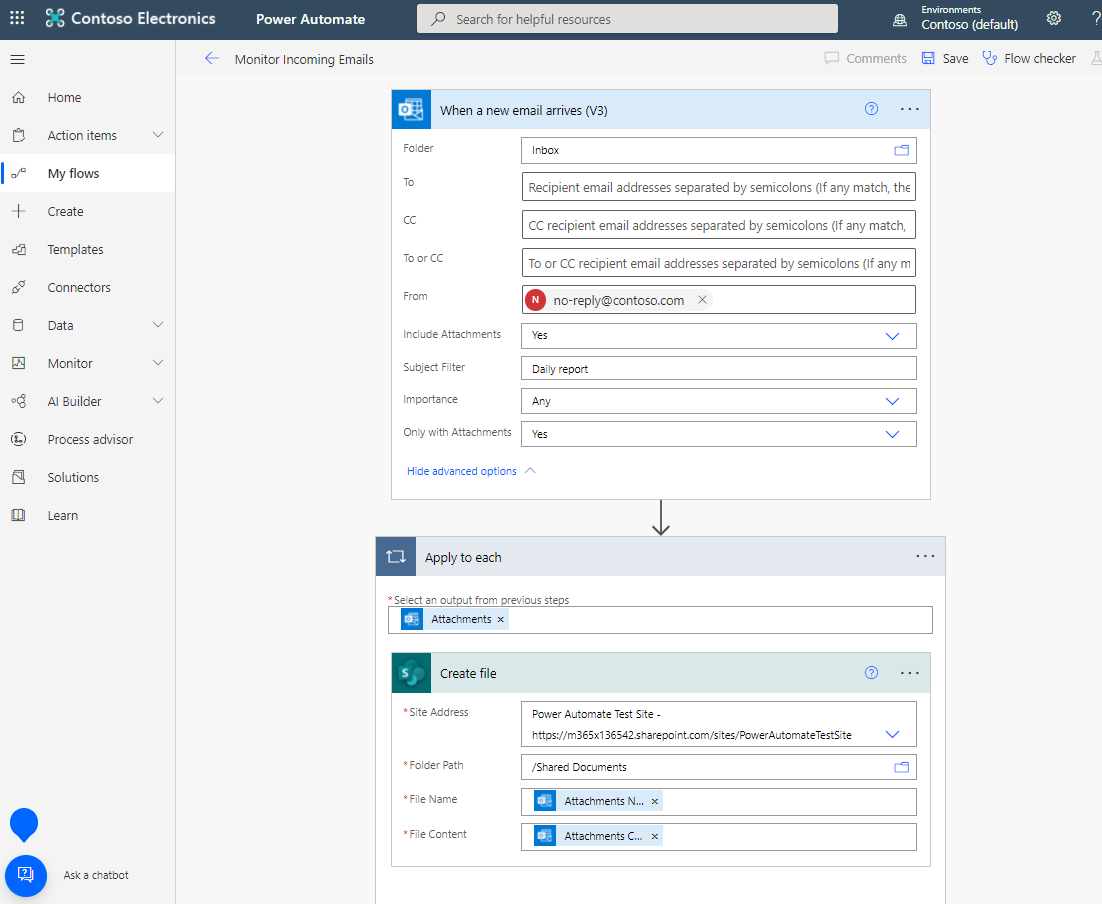
Under Choose your flow's trigger, enter Outlook, select the When a new email arrives (V3) trigger and select Create.
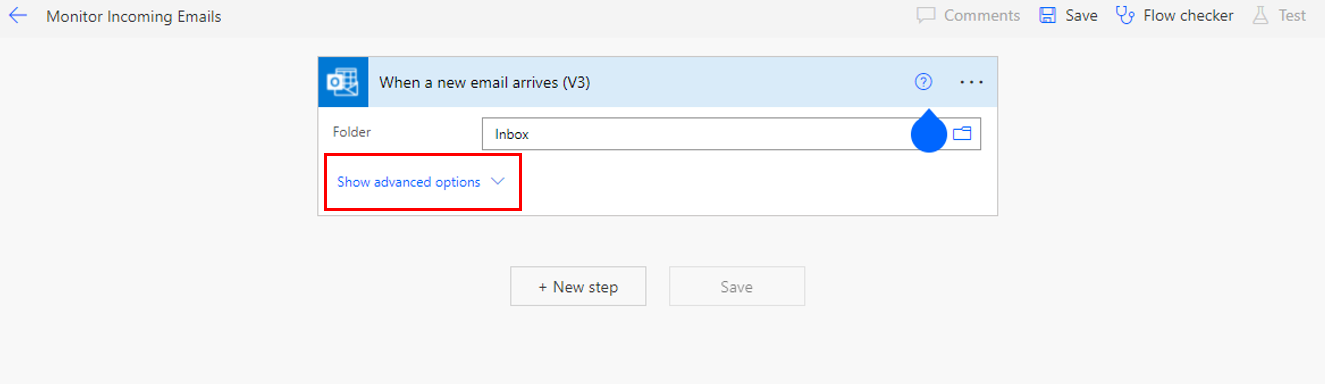
Expand Show advanced options.
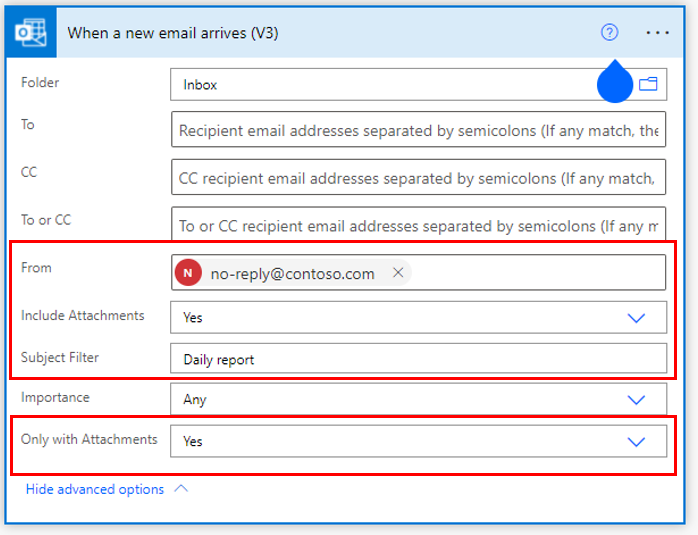
Add the following:
From - 'no-reply@contoso.com'
Include Attachments - 'Yes'
Subject Filter - 'Daily report'
Only with Attachments - 'Yes'
Specify an action
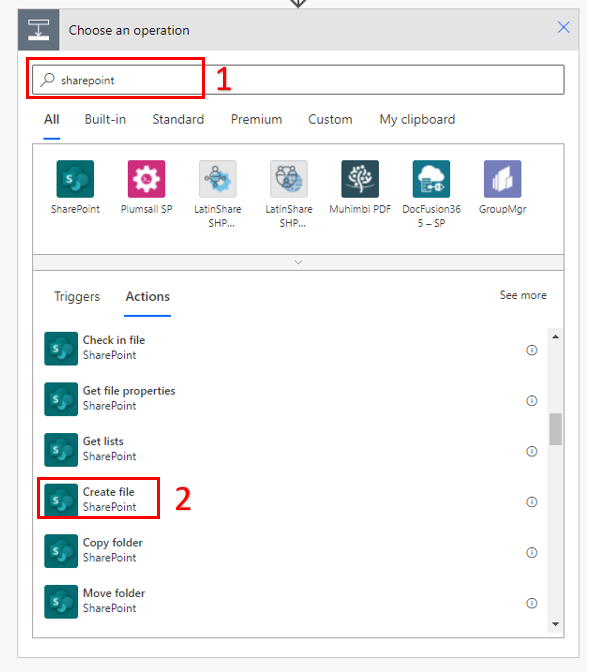
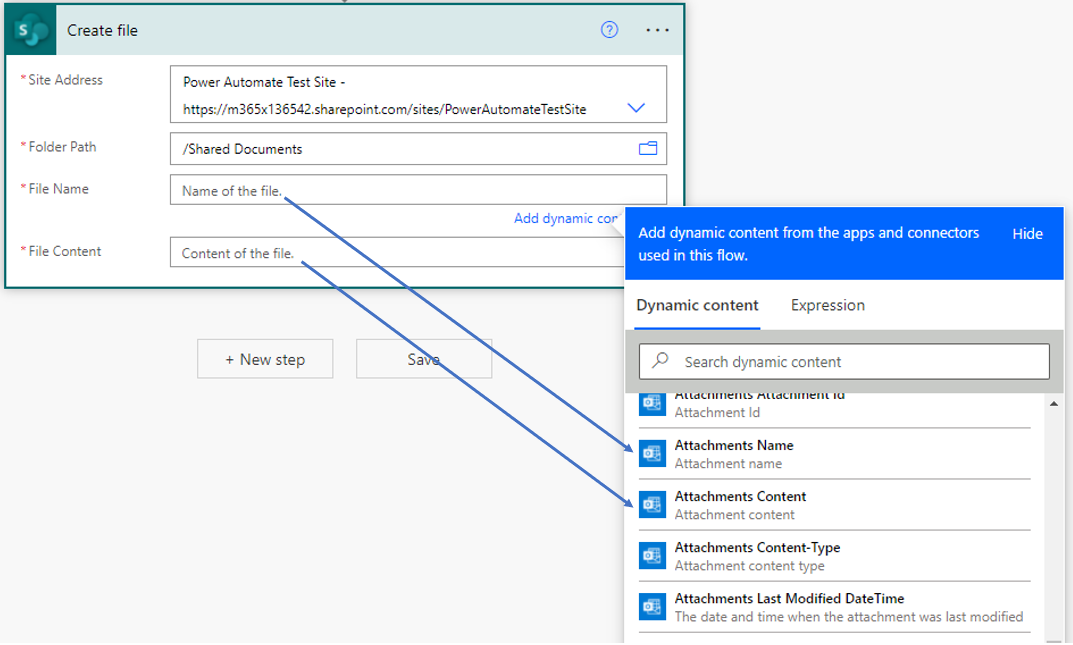
Select New step, and in the search field, enter SharePoint, and then select the create file action.
Add the following:
Site Address - Either copy and paste your URL or select the drop-down and select your site
Folder Path - Select /Shared Documents
File Name - Select Attachments Name from Dynamic Content
File Content - Select Attachments Content from Dynamic Content
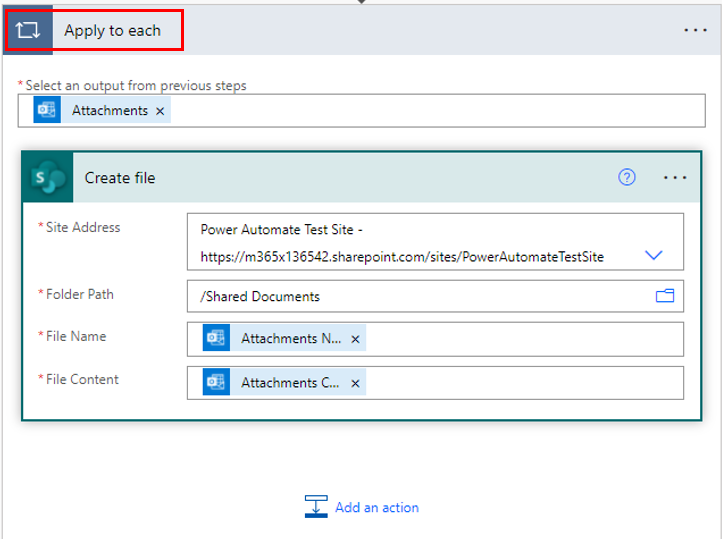
Once the Attachments Name is added the Create file action is automatically added in an Apply to each. This will take care of scenarios when an email comes in with multiple attachments.
You have successfully built a Power Automate flow, which will monitor your Outlook inbox for any emails that have the text Daily report in their Subject line and have Attachments.
Exercise - Share flows
100 XP
7 minutesShared flows extend the potential of Power Automate to groups of people. After all, why should just one person enjoy the benefits of increased automation in his or her work environment?
Here are some advantages of shared flows:
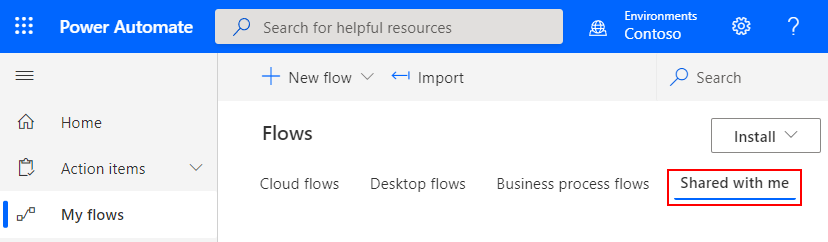
Multiple people can own and manage a flow together.If the creator of a shared flow leaves the organization, the other owners of the flow can continue to run it.All owners of a shared flow can view its history, manage its properties, edit it, add and remove owners, and delete it.If you're the creator or an owner of a shared flow, you'll find it listed on the Shared with me tab in Power Automate.
Note
Shared connections can be used only in the flow in which they were created.Owners can use services in a flow, but they can't change the credentials for a connection that another owner created.Prerequisites
To create a shared flow, you must have a paid Power Automate plan. Also, to add more owners to a shared flow or remove owners from it, you must be the creator or an owner.
Create a shared flow
You create a shared flow by adding more owners to an existing flow. After new owners are added to a flow, the flow appears on the Shared with me tab.
Sign in to Power Automate using your organizational account.
Select My flows.
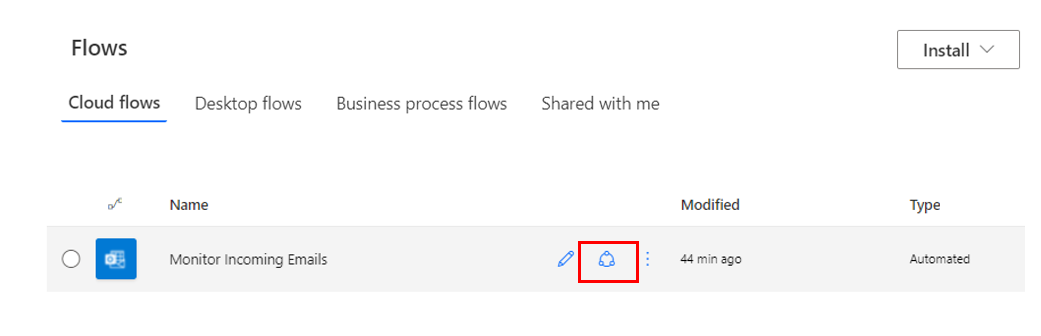
Select the Share button for the flow that you want to change.
In the Owners section, enter the name, email address, or group name of the person or group that you want to add as an owner.
In the list that appears, select the user or group to add.
The user or group becomes an owner of the flow.
Keep in mind that when you share a flow, it appears on the Shared with me tab. It no longer appears on the Cloud flows tab.
Add Microsoft Lists as a co-owner of a flow
You can add a list created using Microsoft Lists as a co-owner of a flow. In that way, everyone who has edit access to the list automatically gets edit access to the flow. After the flow is shared, you can just distribute a link to it.
Important
SharePoint users must have Edit permission or be a member of the Members or Owners group to run flows in SharePoint.
Restrictions on changes to flows
Adding an owner to a cloud flow is the most common way to share a cloud flow. The new owner of the cloud flow can also perform these actions:
View the run history.
Manage the properties of the flow (for example, start or stop the flow, add owners, or update credentials for a connection).
Edit the definition of the flow (for example, add or remove an action or condition).
Add or remove other owners (but not the flow's creator).
Delete the flow.
Once a flow has been shared it is no longer in the Cloud flows but in the Shared with me.
Important
Owners can use services in a cloud flow but can't modify the credentials for a connection that another owner created. Also, shared connections can be used only in the flow in which they were created.
Remove an owner
Important
If you remove an owner whose credentials are used to access Power Automate services, be sure to update the credentials for those connections, so that the flow continues to work correctly.
On the Shared with me tab, select the Share button for the flow that you want to change.
Select the Delete button for the owner that you want to remove.
Embedded and other connections
The connections that are used in a flow fall into two categories:
Embedded: These connections are used in the flow.Other: These connections have been defined for the flow, but they aren't used in it.If you stop using a connection in a flow, that connection appears in the Other connections list. It will remain there until an owner includes it in the flow again.
To view the list of connections, change the shared flow.
On the Shared with me tab, select the Share button for the flow that you want to change.
The list of connections appears under the list of owners in the flow's properties.
Troubleshoot flows
100 XP
8 minutesIn this unit, you'll learn how to troubleshoot common issues that might occur while you run your flows.
Identify the error
Before you can fix a flow, you must identify why it failed. You will get an email with a list of failures each week.
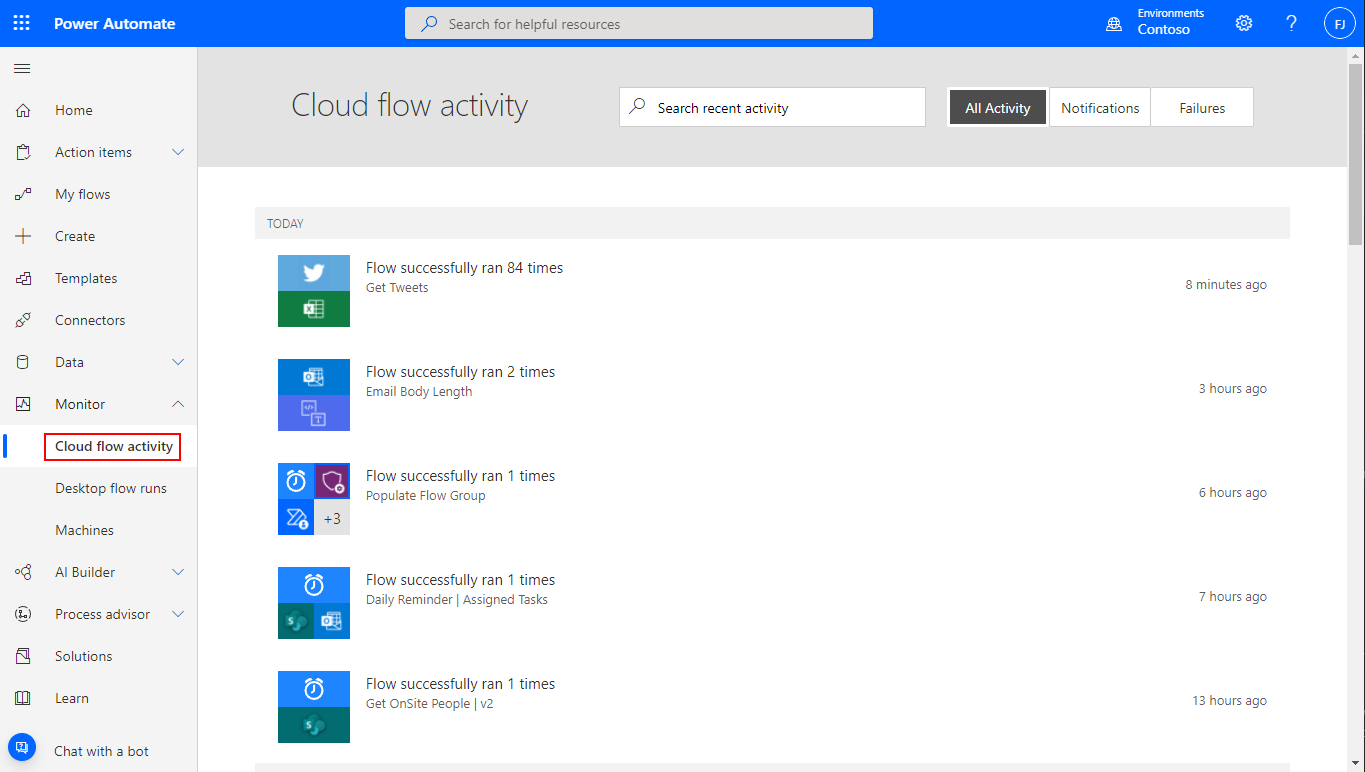
Select the Monitor and then Cloud flow activity on the left menu (or select the Activity tab in the mobile app), and then select your flow in the list that appears.
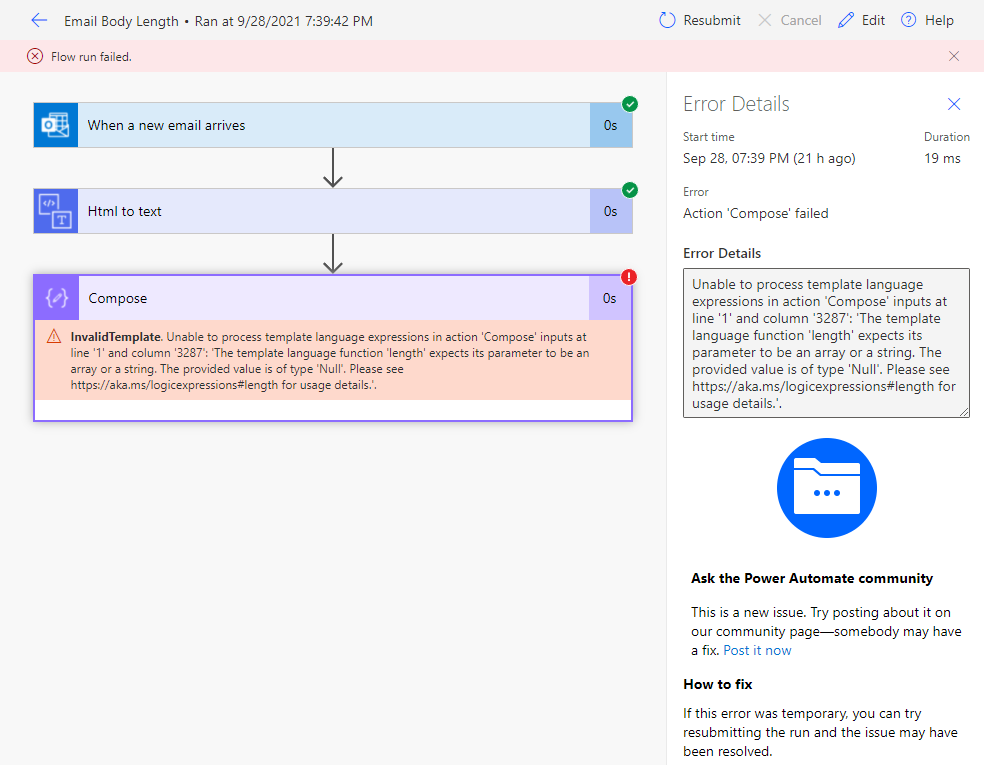
Details about the flow appear, and at least one step has a red exclamation point (!) symbol. Open that step, and review the error message.
Authentication failures
In many cases, flows fail because of an authentication error. If this type of error occurs, the error message includes the word "Unauthorized," or an error code of 401 or 403 appears. You can usually fix authentication errors by updating the connection.
You can view the connections by opening up the flow details by selecting the flow from My Flows.Scroll to the connection that you saw the "Unauthorized" error message for.Next to the connection, select the Fix connection link in the message that states that the connection hasn't been authenticated.Verify your credentials by following the instructions that appear. Then return to your flow-run failure, and select Resubmit.The flow should now run as expected.
Action configuration issues
Flows sometimes fail if a setting in one of the flow's actions doesn't work as expected. In this case, the error message includes the phrase "Bad request" or "Not found," or an error code 400 or 404 appears.
The error message should indicate how to fix the failure.
Select the Edit button, and then fix the issues inside the flow definition.Save the updated flow, and then select Resubmit to try to run the flow again with the updated configuration.Temporary issues
If error code 500 or 502 appears, the failure is temporary or transient.
Select Resubmit to try to run the flow again.Issues with your pricing plan
Sometimes your flows might behave unexpectedly because you aren't using the correct plan.
To view your plan, in Power Automate, select Learn. It will redirect you to the Microsoft Power Automate documentation page. Here select Learn Power Automate, and then select Pricing.
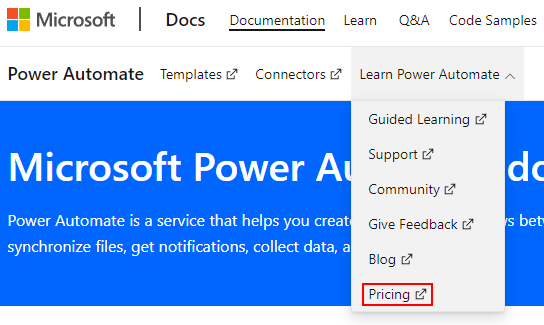
Learn more about pricing and how to switch plans.
Issues with data usage
You might have run out of data that you can use.
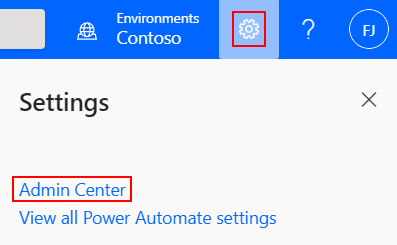
If you're on a free plan or a trial plan, select the Settings button (the gear symbol) to show your current usage against your plan.
If you're on a paid plan, runs are pooled across all users in your organization. We're working on features that will show information about available quotas and usage across an organization.
Important
If you exceed your data limit, Power Automate throttles your flow runs.
Learn more about usage limits.
You might be running flows too often
Your plan determines how often your flows run. For example, your flows might run every 15 minutes if you're on the free plan. If a flow is triggered less than 15 minutes after its last run, it's queued until 15 minutes have passed.
Whenever a flow is triggered, whether by an automatic trigger or because you manually start it, the action counts as a run. Checks for new data don't count as runs.
Learn more about usage limits.
You might be using an incorrect account
If you sign in by using a Microsoft account (for example, an account that ends with @outlook.com or @gmail.com), you can use only the free plan. To take advantage of the features of the paid plan, sign in by using your organizational account or school email address.
To upgrade, use an organizational account or a school account, or create a Microsoft Office 365 trial account.
Some flows run more often than expected
Some flows might run more often than you expect. For example, you create a flow that sends you a push notification whenever your manager sends you an email. That flow must run every time you get an email from anyone, because the flow must check whether the email came from your manager. This action counts as a run.
Other issues that are based on limits, and caveats
You might have issues that are based on other limits:
Each account can have up to:
600 flows.50 custom connectors.20 connections per application programming interface (API) and 100 connections total.You can install a gateway only in the default environment.
Some external connectors, like Twitter, implement connection throttling to control the quality of service. Your flows might fail when throttling is in effect. If your flows are failing, review the details of the run that failed in the flow's run history.
Check your knowledge
200 XP
6 minutesKnowledge check: Get started with Power Automate
1.
How can you create a flow that reoccurs daily?
Create the flow and connect the flow to a calendar.
Create the flow and set the flow flag frequency to daily reoccurrence.
Set the Schedule – Recurrence trigger frequency to daily and interval to 1.
This is how you can create a flow that reoccurs on a daily basis.
Create the flow and set the flow flag frequency to hourly and the value to 24.
2.
Every flow has two main parts, a trigger, and one or more actions. Which of the following best describes an action?
Actions are what you want to happen when a trigger is invoked.
Triggers invoke actions.
Actions will trigger the frequency of the flow reoccurrence.
Triggers are what you want to happen when an action is invoked.
Actions are what you want to happen when a trigger is invoked.
Flow actions trigger the flow to occur as long as the defined value of the trigger is met.
3.
You would like to be alerted to when a change is made to a list, what are some ways in which Power Automate can help?
Power Automate can send up a flare near you to alert you of changes.
You can write a flow with Power Automate to send push notifications, texts, or emails for various triggers.
Correct! Power Automate is good that way.
Sorry, Power Automate can't help with that.
Power Automate can send out a tweet whenever a list item is changed.


 Bengali (Bangladesh) ·
  English (United States) ·