
ARTICLE AD
Exercise - Manage app versions in Power Apps
100 XP
5 minutesMicrosoft Power Apps can help if you saved changes to an app that you shouldn't have or if something else goes wrong. For apps that you save in the cloud, Power Apps keeps a history of the changes that you make. You can view each version that you've saved and restore your app to a previous version if necessary. If you shared the app, the people whom you shared it with will also receive the restored version if you republish the app.
View versions of your app
On make.powerapps.com, select Apps on the left pane.
In the list of apps, select the ellipsis (...) next to the app name and then select Details.
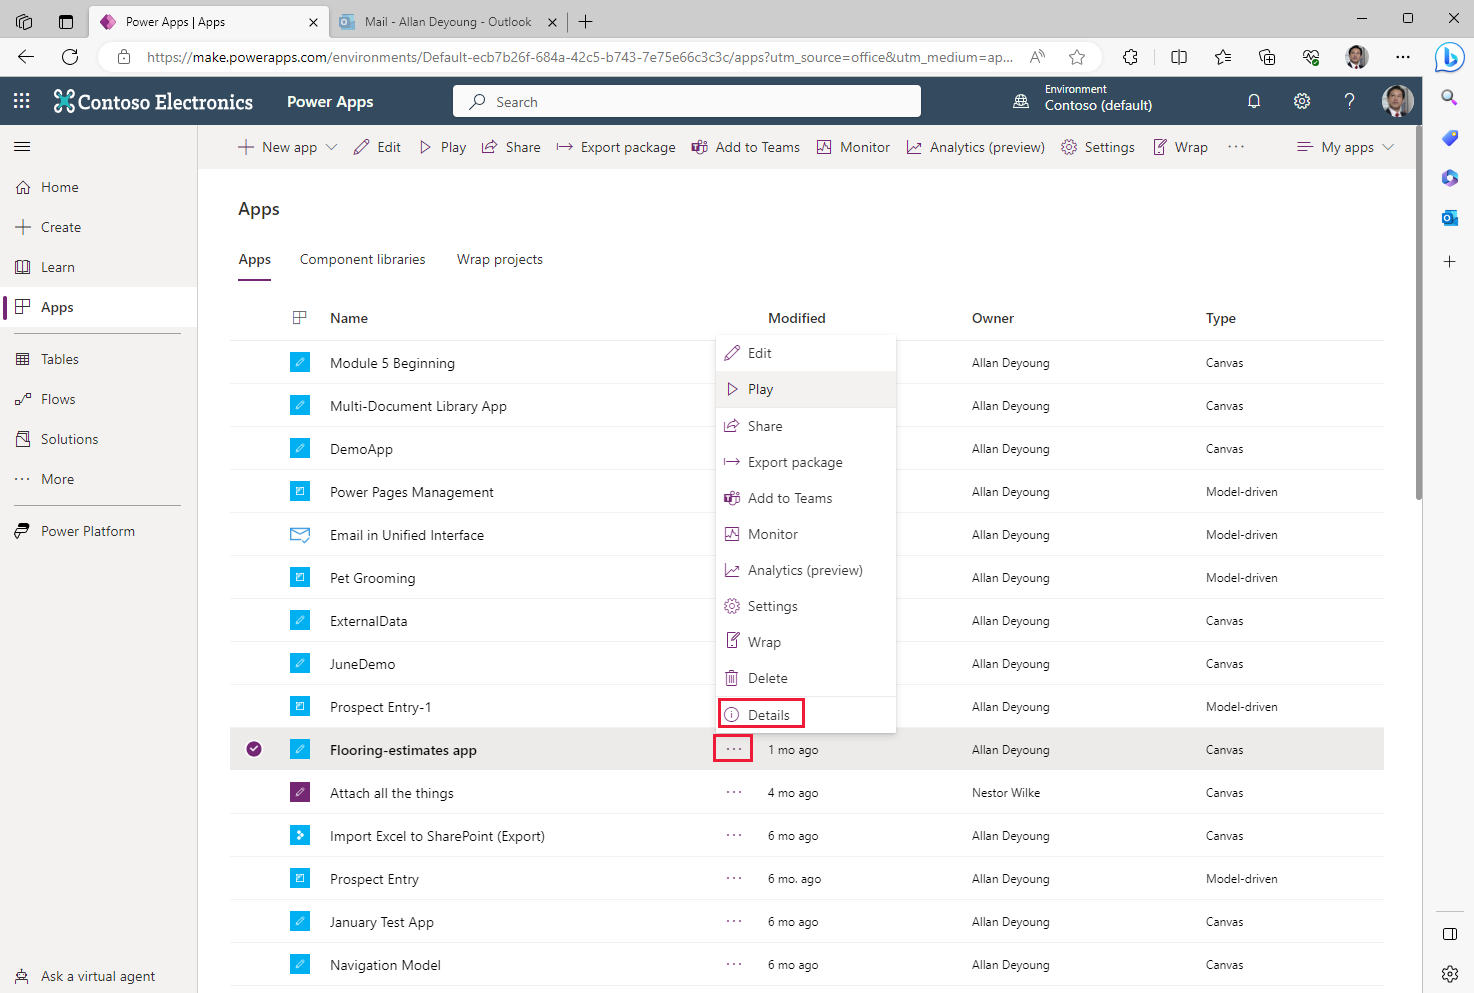
Select the Versions tab.
The tab shows all versions of the app that you saved as you developed it.
Restore a previous version
Select the ellipsis (...) next to the desired version and then select Restore.

Select Restore again to confirm the action.
A new version is added to your list.
When you restore a version of an app, the newly restored version gets a new, incremented version number and appears at the top of the list. A new version never overwrites a previous version.
Note
After restoring a previous version, the restored version needs to be published before users will see the new version. If for some reason you are not able to restore a previous version, you can try the following:
Make sure the App is not open in Power Apps Studio. If the app is open, you will not be able to restore the version.Verify the version you would like to restore is not older than six months. At the current time, only app versions less than six months old can be restored.Exercise - Share apps in Power Apps
100 XP
10 minutesYou can share an app with specific users, groups, or your whole organization. When you share an app with other people, they can run it in a browser or in Microsoft Power Apps Mobile for Microsoft Windows, Apple iOS, or Google Android.
Even better, you can give someone permission to update the app.
Prepare to share an app
There are two basic ways to share an app. You can either open the app that you want to share in Edit mode or from the Apps tab in the maker portal.
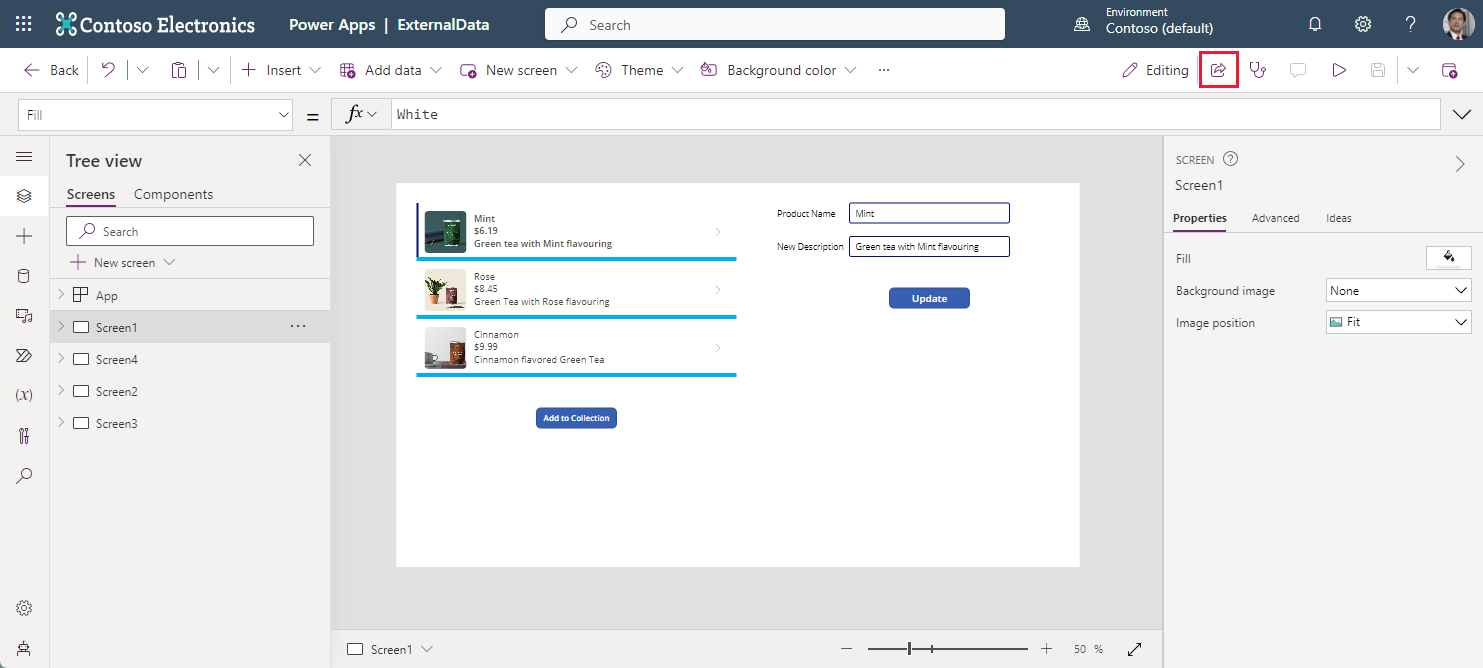
If you want to share an app while editing In Power Apps Studio, select the Share button from the upper right side of the header ribbon. (Note: you can only share an app that has been saved)
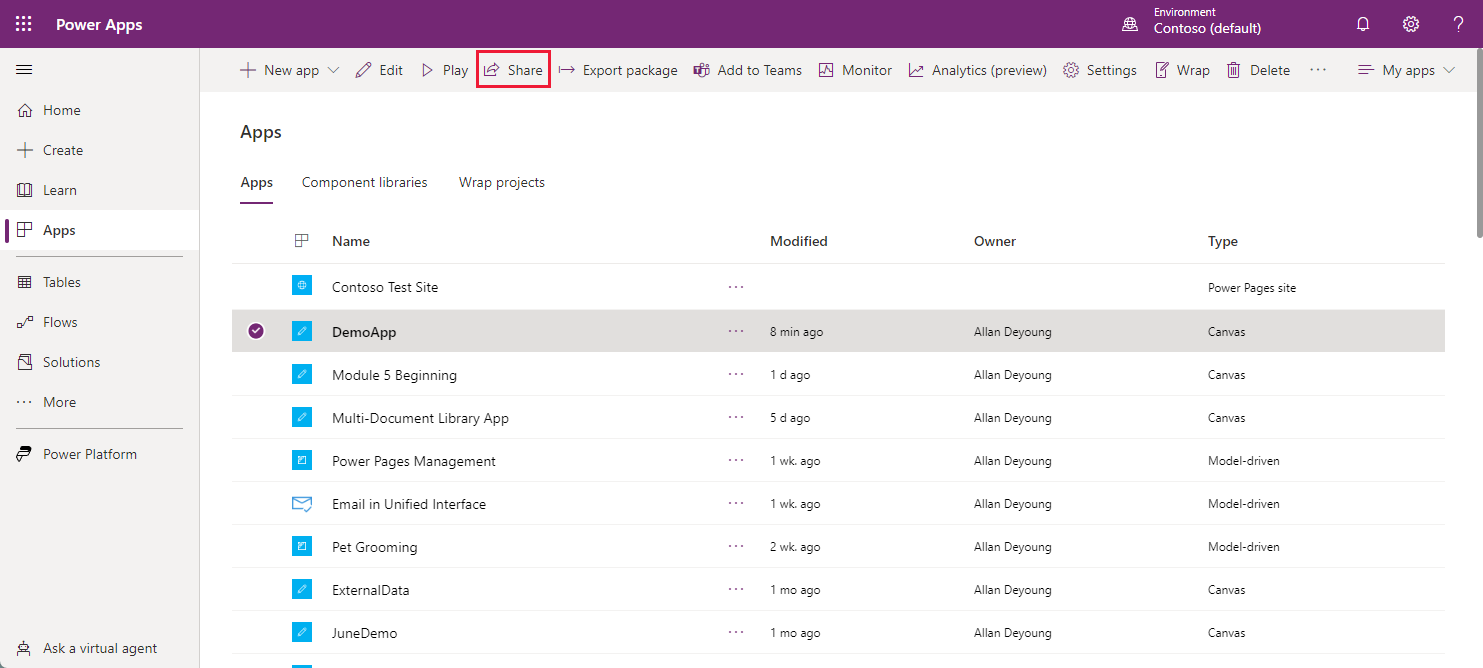
Alternatively, if you want to share an app from the Apps tab in the Power Apps Studio, you can select the app, and then select the Share button from the command ribbon.
After you choose either option, the Share popup window appears on the right half of the screen, and looks like this image below (note that your app will have a different name after Share).
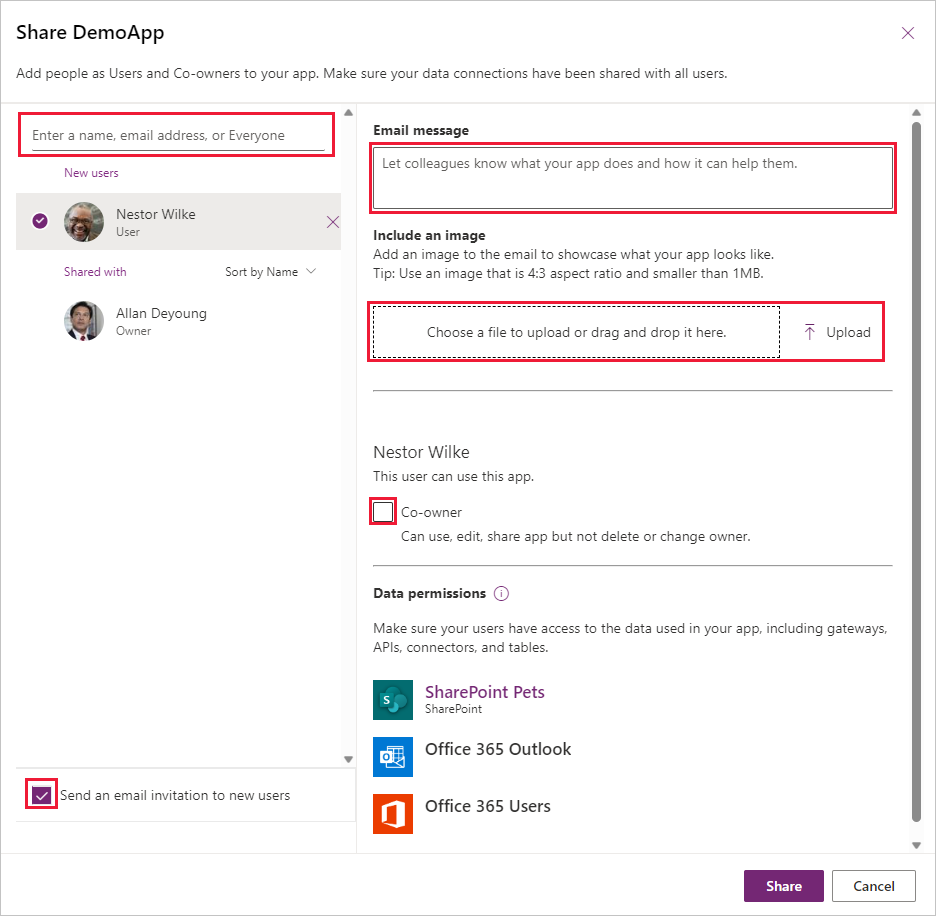
On the Share popup window, the top left portion allows you to use the entry field to specify the users or groups with whom you want to share the app. To add everyone in your organization, type Everyone and select Everyone in [Company Name]. If you need to share with a large group of users, a best practice is to share through an Azure Active Directory Security Group.
Security-group considerations
If you share an app with a security group, existing members of that group, and anyone who joins it, will have the permission that you specify for that group. Anyone who leaves the group loses that permission unless they belong to a different group that has access or if you give them permission as an individual.Every member of a security group has the same permission for an app as the overall group does. However, you can specify greater permissions for one or more members of that group to allow them greater access. For example, you can give Security Group A permission to run an app, but you can also give User B, who belongs to that group, Co-owner permission. Every member of the security group can run the app, but only User B can edit it. If you give Security Group A Co-owner permission and User B permission to run the app, that user can still edit the app.To notify users by email, leave the Send an email invitation to new users check box selected.
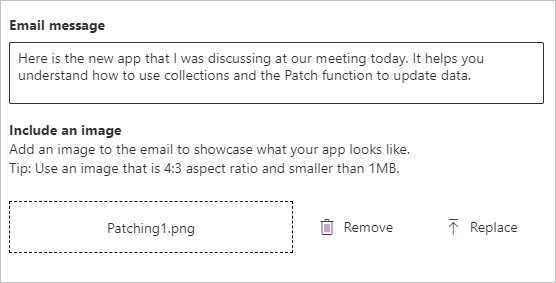
You can add an Email message to your colleagues to tell them about the app by typing directly into the entry field. You can also Include an image by uploading or drag and drop it into the image field.
If you want the user to also be able to edit the app, then select the Co-owner check box. By default, the user receives the User permission. Here's a description of both permissions:
Co-owner - Users can use, edit, and share the app, but not delete or change the owner.User - Users can use the app.If you elect to send an email invite, everyone you shared the app with will receive an email message that has a link to the app. People whom you granted Co-owner permission for the app will also receive a link to Edit App in Power Apps Studio.
Finally, select the Share button.
If you make and save changes to a shared app, the people whom you shared it with will see your changes as soon as you publish them. This can be useful if you improve the app, but it can also negatively affect users if you remove or significantly change features. Remember to create a notification plan for alerting your users of major updates.
Permissions and licensing
Basic information about permissions and licensing that you should be aware of are:
Users and contributors need permissions to any data connections and gateways that a shared app uses. Some permissions come implicitly with the app, but you must explicitly grant others. If you create an app based on Microsoft Dataverse, you must also ensure that the users you share the app with have the appropriate permissions for the table or tables on which the app relies. Specifically, those users must belong to a security role that can perform tasks such as creating, reading, writing, and deleting relevant rows. In many cases, you'll want to create one or more custom security roles with the exact permissions that users need to run the app. You can then assign a role to each user as appropriate.
People who have Co-owner permission also need a Power Apps plan so that they'll be able to perform edits on the app.
Sharing an app is simple, and it's a great way to make an app that you find useful available to people across your organization.
Exercise - Understand environments in Power Apps
100 XP
12 minutesAn environment is a container for apps and other resources, such as data connections and flows from Power Automate. It's a way to group items based on business requirements.

If you've followed along with this module, you've already been working in make.powerapps.com. Therefore, you've been working in a specific environment the whole time. In the upper-right corner of the home page, you can view your current environment.

If you're new to Microsoft Power Apps, you might have only the default environment at this point. If a drop-down menu is visible next to the environment name, it indicates that other environments are available.
Note
If you want to work with Power Apps environments, you need a Power Apps Per app plan or Power Apps Per user plan. Additionally, if you want to work with Dynamics 365 restricted tables, you must have a Power Apps for Dynamics 365 license. To learn more, see Licenses for Dynamics 365.
Reasons to use environments
Reasons to create environments beyond the default one include:
Separate app development by department - In a large organization, each department can work in a different environment. That way, department employees see only apps and company data that are appropriate to their needs.
Support application lifecycle management (ALM) - Separate environments let you separate apps that are in development stages from ones that have already been shared. Alternatively, you might want to use a trial environment so that you can receive feedback from employees before publishing the final app. For some organizations, showing apps before they're completely developed and published can present security concerns.
Manage data access - Each environment can have its own source of business data, called a database for Microsoft Dataverse. Other data connections are specific to an environment and can't be shared across environments.
Note
Keep in mind that environments are relevant only to app creators and Power Apps admins. When you share an app with users, those users simply run the app, providing they have the correct permissions. In other words, they don't have to worry about what environment the app came from.
Create an environment
Only an admin can create environments. If you aren't an admin, this information can still be helpful when you talk to your admin about setting up environments.
On the make.powerapps.com home page, select the gear icon near the upper-right corner and then select Admin center.
You can also go directly to https://admin.powerplatform.microsoft.com
In Microsoft Power Platform admin center, select + New.
In the New environment dialog box, enter a name for the environment and then select a region and an environment type.
To the left of Create a database for this environment, select the toggle to Yes.
Select Next.
Select the currency and language for the data that is stored in the database. You can't change the currency or language after the database is created.
Select Save.
It might take several minutes to create the database on Dataverse. After the database is created, the new environment appears in the list of environments on the Environments page.
You now have a new environment to work in. If you go back to make.powerapps.com, you'll see it in the environments list.
Manage access to an environment
By default, you can access an environment in one of two ways:
System admin - A system admin has full permissions to create and manage environments.
Environment maker - An environment maker can view all apps in that environment, create apps, and work with Dataverse (other permissions apply).
Environment admins can create other security roles as needed. They can also add and assign users to these roles.
Start by going to https://admin.powerplatform.microsoft.com
On the left pane, Environments should be selected by default, if it isn't, select Environments.
Select the test environment that you created, and then select Settings at the top.
Select the Users + permissions dropdown and select Users.
Select Add user at the top and add the user by entering the email address of the user in your organization and then selecting Add. Wait a few minutes for the user to be added.
To manage the roles and information of a user, select the user’s Name. A new tab opens with the Dynamics 365 view of that user.
Select Manage Roles on the top bar.
In the Manage User Roles box, select the role(s) for the user. In this example, assign the user to the Environment Maker role.
Select OK.
The changes are then saved, so you can close the Dynamics 365 tab in your browser when done.
Power Apps review
100 XP
5 minutesCongratulations on building your first app!
To review, so far you've learned how to:
Build an app based on data in a Microsoft Excel workbook that's stored in Microsoft OneDrive for Business. You learned that Microsoft Power Apps can connect almost as easily to data sources that you're already using in the cloud (such as Microsoft SharePoint, Microsoft Azure, Google Drive, and Salesforce) or on-premises.
Customize an app to make it your own by modifying the appearance and behavior and adding Excel-like functions.
Share apps instantly with your co-workers across the web, tablets, and mobile devices.
Set up environments so that you can separate a working environment from the one that you want to share with your team.
The best way to advance your skills is to run the samples, practice using the templates, and generate more apps from your own data.
Next steps
One goal of this module is to provide a clearer picture of what Power Apps is and how you can start creating apps, regardless of your experience level. The following are useful resources and downloads to help enhance your further learning.
Power Apps resources
Explore further with the Power Apps documentation.
Stay current with the Power Apps blog.
Join the Power Apps community.
Expand your expertise with more Power Apps learning paths:
Use basic formulas to make better Power Apps canvas apps
Work with data in a Power Apps canvas app
Use the UI and controls in a canvas app in Power Apps
Use advanced data options and connectors in Power Apps
Master advanced techniques for Power Apps canvas apps
Improve Power Apps by submitting an idea.
Power Apps downloads
Check your knowledge
200 XP
8 minutesAnswer the following questions to see what you've learned.
1.
When you share an app, what two permission levels are available?
User and Co-Owner
The two permission levels available are User and Co-Owner.
Editor and Co-Owner
User and Editor
Editor and Owner
2.
When you publish a new version of your app, what do users need to do?
To see the new version, everyone with whom the app was shared must reinstall it.
Everyone with whom you shared the app will automatically see the new version.
Everyone you shared the app with sees the new version automatically.
All previous versions are deleted.
Delete the old version app, then install the new version of the app.
3.
What is a reason to use environments?
Create packaged solutions
Manage data capacity by adding new environments
Share apps outside of your organization
Manage access to data
Environments can be shared with specific users, allowing you to manage who can access certain data.


 Bengali (Bangladesh) ·
  English (United States) ·